

Spryker is a highly flexible and modular e-commerce platform. Its Backoffice is an administrative interface where users can manage different types of data such as products, customers, orders, and much more. In this guide, we’ll walk through how to add, update, and delete data in the Spryker Backoffice by developing a custom module.
Prerequisites
- Basic knowledge of PHP and Symfony.
- Familiarity with Spryker’s architecture and Backoffice.
- A working Spryker project setup.
- A development environment for testing your custom module.
- Setting Up Your Custom Module
Before you can perform operations like adding, updating, and deleting data, you’ll need to set up your custom module in Spryker.
Create the Module
Go termanal and go your spryker folder root then
Run following commad
|
1 2 |
docker/sdk up docker/sdk cli |
|
1 |
console code:generate:module:zed CustomGrid |

Go this path your module is now created
your-spryker-project/src/Pyz/Zed/CustomGrid/
Define the basic structure: Inside your module, create the essential directories and files:
your-spryker-project/src/Pyz/Zed/CustomGrid/
-Business/
-Communication/
-Persistence/
-Presentation/
-CustomGridConfig.php
-CustomGridDependencyProvider.php
Step 1:Menu show in backoffice navigation
Here is already define code you need copy code in this file
your-spryker-project/src/Pyz/Zed/CustomGrid/Communication/navigation.xml
In this path need paste code below code
your-spryker-project/config/Zed/navigation.xml
|
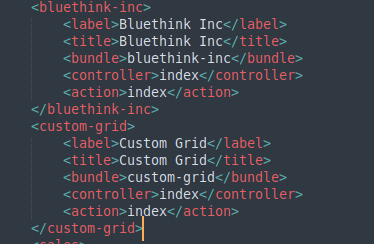
1 2 3 4 5 6 7 8 |
<custom-grid> <label>Custom Grid</label> <title>Custom Grid</title> <bundle>custom-grid</bundle> <controller>index</controller> <action>index</action> <icon>fa-th</icon> </custom-grid> |
Go termenal run follwing command
|
1 |
console c:e |
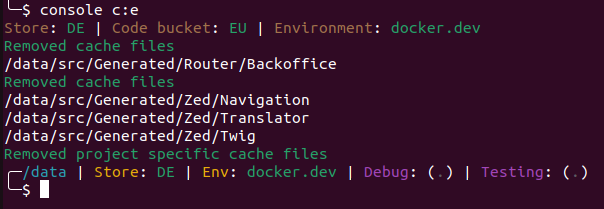
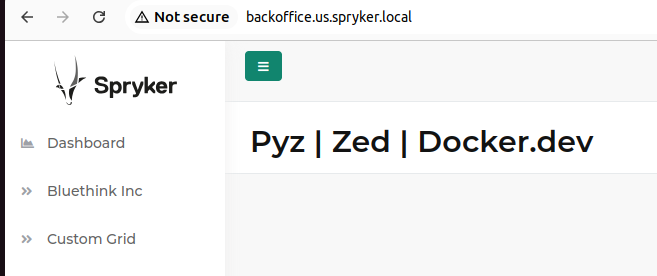
Now menu is show on backoffice spryker
Step 2:Modify this file
your-spryker-project/src/Pyz/Zed/CustomGrid/CustomGridDependencyProvider.php
|
1 2 3 4 5 6 7 8 9 10 11 12 13 14 15 16 17 18 19 20 21 22 23 24 25 26 27 28 29 30 31 32 33 34 35 36 37 38 39 40 41 42 43 44 45 46 47 48 49 50 51 52 53 54 55 56 57 58 59 60 61 62 63 64 65 66 67 68 69 70 71 72 73 74 75 76 77 78 79 80 81 82 83 84 85 86 87 88 89 90 |
<?php /** * This file is part of the Spryker Commerce OS. * For full license information, please view the LICENSE file that was distributed with this source code. */ namespace Pyz\Zed\CustomGrid; use Orm\Zed\CustomGrid\Persistence\CustomGridQuery; use Spryker\Zed\Kernel\AbstractBundleDependencyProvider; use Spryker\Zed\Kernel\Container; class CustomGridDependencyProvider extends AbstractBundleDependencyProvider { /** * @var string */ public const PROPEL_QUERY_CUSTOM_GRID = 'PROPEL_QUERY_CUSTOM_GRID'; /** * @var string */ public const FACADE_CUSTOM_GRID = 'FACADE_CUSTOM_GRID'; /** * @param \Spryker\Zed\Kernel\Container $container * * @return \Spryker\Zed\Kernel\Container */ public function provideCommunicationLayerDependencies(Container $container) { $container = $this->addCustomGridQuery($container); $container = $this->addCustomGridFacade($container); return $container; } /** * @param \Spryker\Zed\Kernel\Container $container * * @return \Spryker\Zed\Kernel\Container */ protected function addCustomGridQuery(Container $container) { $container->set(static::PROPEL_QUERY_CUSTOM_GRID, $container->factory(function () { return CustomGridQuery::create(); })); return $container; } /** * @param \Spryker\Zed\Kernel\Container $container * * @return \Spryker\Zed\Kernel\Container */ public function provideBusinessLayerDependencies(Container $container) { //TODO Provide dependencies return $container; } /** * @param \Spryker\Zed\Kernel\Container $container * * @return \Spryker\Zed\Kernel\Container */ public function providePersistenceLayerDependencies(Container $container) { //TODO Provide dependencies return $container; } /** * @param \Spryker\Zed\Kernel\Container $container * * @return \Spryker\Zed\Kernel\Container */ protected function addCustomGridFacade(Container $container) { $container->set(static::FACADE_CUSTOM_GRID, function (Container $container) { return $container->getLocator()->customGrid()->facade(); }); return $container; } } |
Step 3:Create controller files
your-spryker-project/src/Pyz/Zed/CustomGrid/Communication/Controller/AddController.php
|
1 2 3 4 5 6 7 8 9 10 11 12 13 14 15 16 17 18 19 20 21 22 23 24 25 26 27 28 29 30 31 32 33 34 35 36 37 38 39 40 41 42 43 44 45 46 47 48 49 50 51 52 53 54 55 56 57 58 59 60 61 62 63 64 65 66 67 68 69 70 71 72 73 74 |
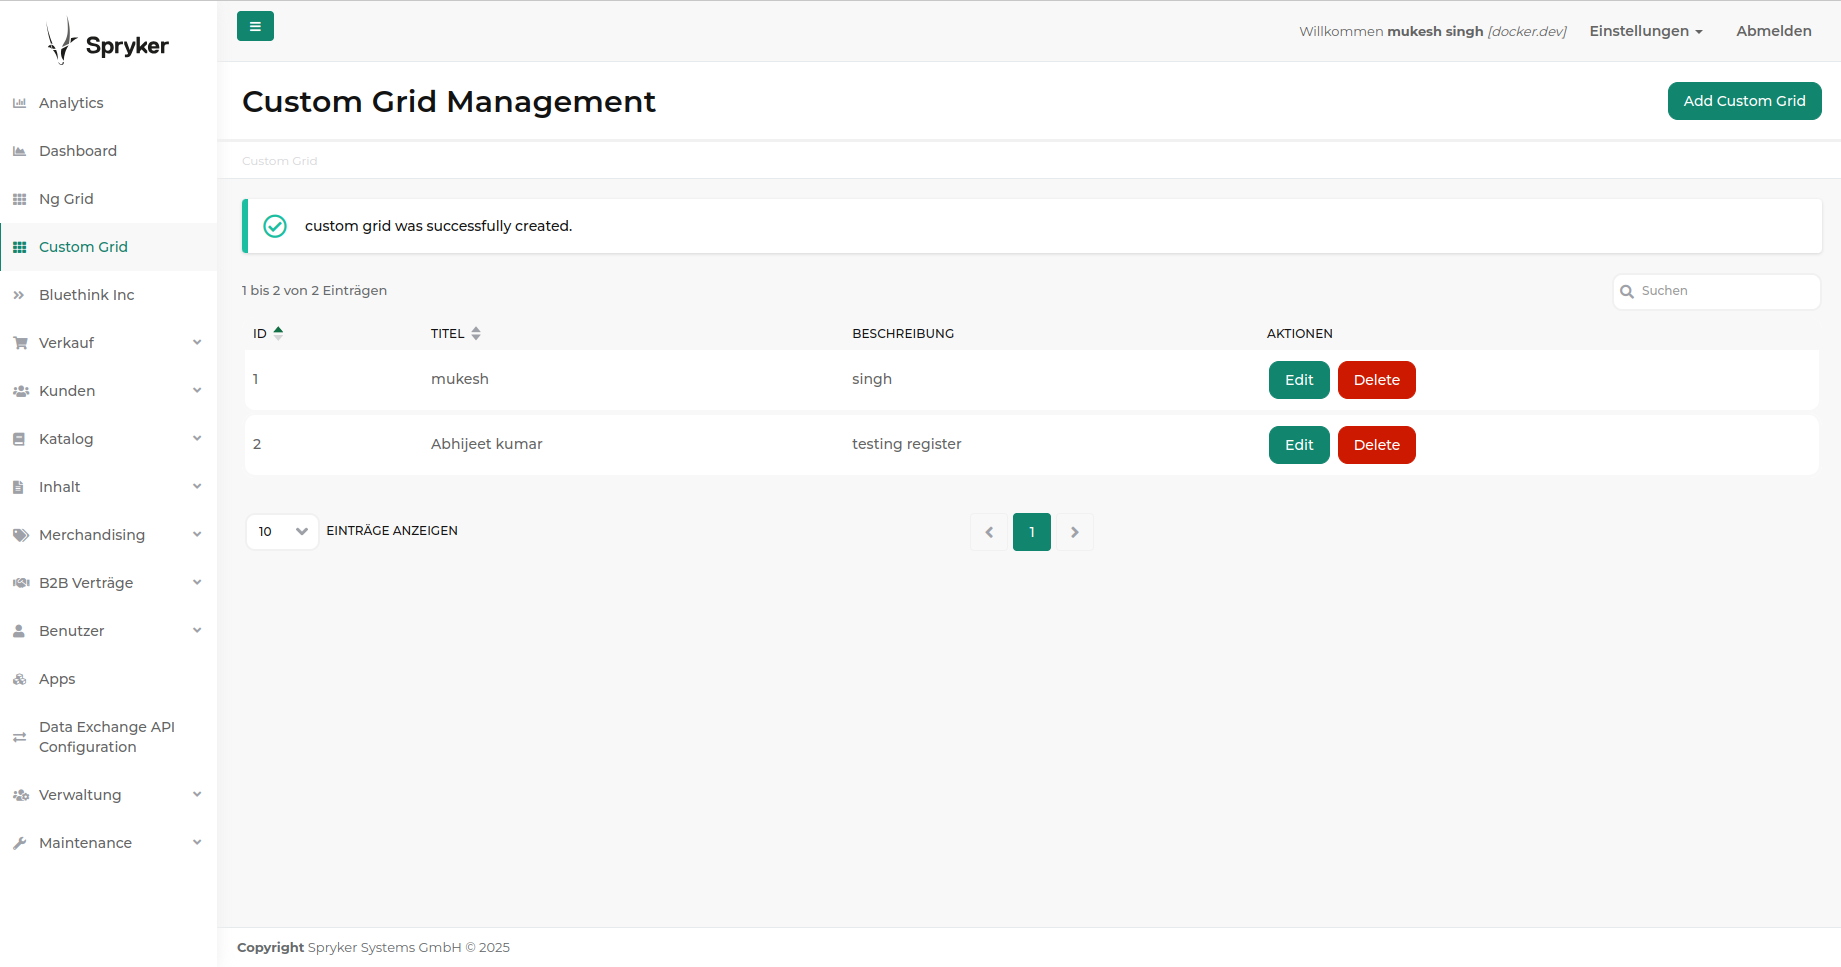
<?php /** * This file is part of the Spryker Commerce OS. * For full license information, please view the LICENSE file that was distributed with this source code. */ namespace Pyz\Zed\CustomGrid\Communication\Controller; use Generated\Shared\Transfer\CustomGridTransfer; use Spryker\Service\UtilText\Model\Url\Url; use Spryker\Zed\Kernel\Communication\Controller\AbstractController; use Symfony\Component\Form\FormInterface; use Symfony\Component\HttpFoundation\Request; /** * @method \Pyz\Zed\NgGrid\Communication\NgGridCommunicationFactory getFactory() * @method \Pyz\Zed\NgGrid\Business\NgGridFacadeInterface getFacade() */ class AddController extends AbstractController { /** * @var string */ protected const URL_CUSTOM_GRID_OVERVIEW = '/custom-grid'; /** * @var string */ protected const MESSAGE_CUSTOM_GRID_CREATED_SUCCESS = 'custom grid was successfully created.'; /** * @param \Symfony\Component\HttpFoundation\Request $request */ public function indexAction(Request $request) { $customGridCreateForm = $this->getFactory() ->createCustomGridCreateForm(new CustomGridTransfer()) ->handleRequest($request); if ($customGridCreateForm->isSubmitted() && $customGridCreateForm->isValid()) { return $this->createCustomGrid($customGridCreateForm); } // dd($ngGridCreateForm->createView()); return $this->viewResponse([ 'custom_gridCreateForm' => $customGridCreateForm->createView(), 'backUrl' => $this->getCustomGridOverviewUrl(), ]); } /** * @param \Symfony\Component\Form\FormInterface $ngGridCreateForm * * @return \Symfony\Component\HttpFoundation\RedirectResponse */ protected function createCustomGrid(FormInterface $customGridCreateForm) { $customGridTransfer = $customGridCreateForm->getData(); $customGridTransfer = $this->getFactory()->getCustomGridFacade()->createCustomGrid($customGridTransfer); $this->addSuccessMessage(static::MESSAGE_CUSTOM_GRID_CREATED_SUCCESS); return $this->redirectResponse($this->getCustomGridOverviewUrl()); } /** * @return string */ protected function getCustomGridOverviewUrl(): string { return (string)Url::generate(static::URL_CUSTOM_GRID_OVERVIEW); } } |
your-spryker-project/src/Pyz/Zed/CustomGrid/Communication/Controller/DeleteController.php
|
1 2 3 4 5 6 7 8 9 10 11 12 13 14 15 16 17 18 19 20 21 22 23 24 25 26 27 28 29 30 31 32 33 34 35 36 37 38 39 40 41 42 43 44 45 46 47 48 49 50 51 52 53 54 55 56 57 58 59 60 61 62 63 64 65 66 67 68 69 70 71 72 |
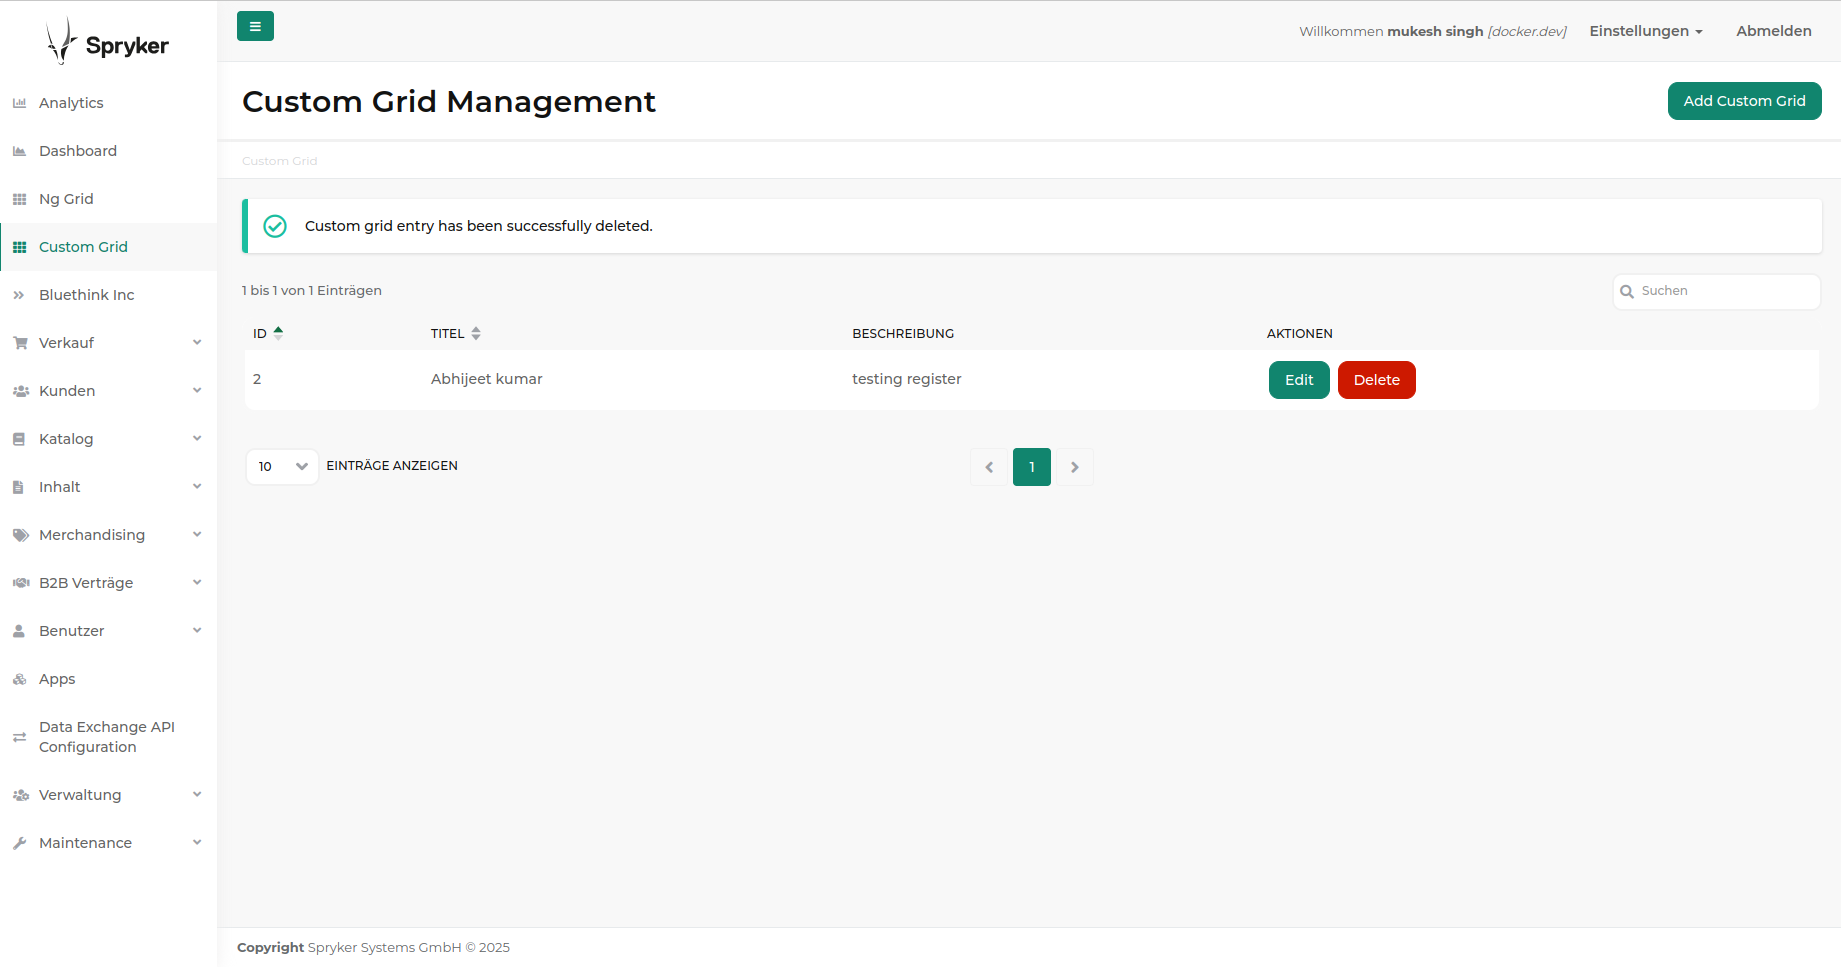
<?php namespace Pyz\Zed\CustomGrid\Communication\Controller; use Generated\Shared\Transfer\CustomGridTransfer; use Generated\Shared\Transfer\MessageTransfer; use Spryker\Service\UtilText\Model\Url\Url; use Spryker\Zed\Kernel\Communication\Controller\AbstractController; use Symfony\Component\HttpFoundation\RedirectResponse; use Symfony\Component\HttpFoundation\Request; /** * @method \Pyz\Zed\NgGrid\Communication\NgGridCommunicationFactory getFactory() * @method \Pyz\Zed\NgGrid\Business\NgGridFacadeInterface getFacade() */ class DeleteController extends AbstractController { /** * @var string */ protected const URL_CUSTOM_GRID_OVERVIEW = '/custom-grid'; /** * @var string */ protected const MESSAGE_CUSTOM_GRID_DELETED_SUCCESS = 'Custom grid entry has been successfully deleted.'; /** * Delete a custom grid entry by its ID. * * @param \Symfony\Component\HttpFoundation\Request $request * * @return \Symfony\Component\HttpFoundation\RedirectResponse */ public function indexAction(Request $request): RedirectResponse { // Retrieve the ID from the query parameters (GET request) $idCustomGrid = $request->query->get('id'); if (!$idCustomGrid) { // If no ID is provided, redirect with an error message $this->getMessenger()->addErrorMessage('Invalid ID provided. Deletion failed.'); return $this->redirectResponse($this->getCustomGridOverviewUrl()); } // Create a CustomGridTransfer object to pass the ID to the business layer $customGridTransfer = new CustomGridTransfer(); $customGridTransfer->setId($idCustomGrid); // Call the Facade to delete the record $this->getFactory()->getCustomGridFacade()->deleteCustomGrid($customGridTransfer); // Create a MessageTransfer object for the success message $messageTransfer = new MessageTransfer(); $messageTransfer->setValue(static::MESSAGE_CUSTOM_GRID_DELETED_SUCCESS); // Add success message $this->getMessenger()->addSuccessMessage($messageTransfer); // Redirect to the overview page return $this->redirectResponse($this->getCustomGridOverviewUrl()); } /** * Get the URL for the custom grid overview. * * @return string */ protected function getCustomGridOverviewUrl(): string { return (string)Url::generate(static::URL_CUSTOM_GRID_OVERVIEW); } } |
your-spryker-project/src/Pyz/Zed/CustomGrid/Communication/Controller/EditController.php
|
1 2 3 4 5 6 7 8 9 10 11 12 13 14 15 16 17 18 19 20 21 22 23 24 25 26 27 28 29 30 31 32 33 34 35 36 37 38 39 40 41 42 43 44 45 46 47 48 49 50 51 52 53 54 55 56 57 58 59 60 61 62 63 64 65 66 67 68 69 70 71 72 73 74 75 76 77 78 79 80 81 82 83 84 85 86 87 88 89 90 91 92 |
<?php /** * This file is part of the Spryker Commerce OS. * For full license information, please view the LICENSE file that was distributed with this source code. */ namespace Pyz\Zed\CustomGrid\Communication\Controller; use Generated\Shared\Transfer\CustomGridTransfer; use Spryker\Service\UtilText\Model\Url\Url; use Spryker\Zed\Kernel\Communication\Controller\AbstractController; use Symfony\Component\Form\FormInterface; use Symfony\Component\HttpFoundation\Request; /** * @method \Pyz\Zed\NgGrid\Communication\NgGridCommunicationFactory getFactory() * @method \Pyz\Zed\NgGrid\Business\NgGridFacadeInterface getFacade() */ class EditController extends AbstractController { /** * @var string */ protected const URL_CUSTOM_GRID_OVERVIEW = '/custom-grid'; /** * @var string */ protected const MESSAGE_CUSTOM_GRID_UPDATED_SUCCESS = 'custom grid was successfully updated.'; /** * @param \Symfony\Component\HttpFoundation\Request $request */ public function indexAction(Request $request) { $id = $request->get('id'); $customGridTransfer = $this->getFactory()->getCustomGridFacade()->findCustomGridById($id); if (!$customGridTransfer) { // Handle the case where the custom grid was not found $this->addErrorMessage('Custom grid not found.'); return $this->redirectResponse($this->getCustomGridOverviewUrl()); } // Create the form with existing data for editing $customGridEditForm = $this->getFactory() ->createCustomGridEditForm($customGridTransfer) ->handleRequest($request); if ($customGridEditForm->isSubmitted() && $customGridEditForm->isValid()) { return $this->updateCustomGrid($customGridEditForm); } return $this->viewResponse([ 'form' => $customGridEditForm->createView(), 'backUrl' => $this->getCustomGridOverviewUrl(), 'entity' => $customGridTransfer, // Pass the entity to the view for displaying the current grid ]); } /** * @param \Symfony\Component\Form\FormInterface $customGridEditForm * * @return \Symfony\Component\HttpFoundation\RedirectResponse */ protected function updateCustomGrid(FormInterface $customGridEditForm) { $customGridTransfer = $customGridEditForm->getData(); // Call the update method in the facade $updatedCustomGridTransfer = $this->getFactory() ->getCustomGridFacade() ->updateCustomGrid($customGridTransfer); if ($updatedCustomGridTransfer) { $this->addSuccessMessage(static::MESSAGE_CUSTOM_GRID_UPDATED_SUCCESS); } else { $this->addErrorMessage('Failed to update custom grid.'); } return $this->redirectResponse($this->getCustomGridOverviewUrl()); } /** * @return string */ protected function getCustomGridOverviewUrl(): string { return (string)Url::generate(static::URL_CUSTOM_GRID_OVERVIEW); } } |
your-spryker-project/src/Pyz/Zed/CustomGrid/Communication/Controller/IndexController.php
|
1 2 3 4 5 6 7 8 9 10 11 12 13 14 15 16 17 18 19 20 21 22 23 24 25 26 27 28 29 30 31 32 33 34 35 36 37 38 39 |
<?php namespace Pyz\Zed\CustomGrid\Communication\Controller; use Spryker\Zed\Kernel\Communication\Controller\AbstractController; use Symfony\Component\HttpFoundation\JsonResponse; /** * @method \Pyz\Zed\CustomGrid\Business\CustomGridFacadeInterface getFacade() * @method \Pyz\Zed\CustomGrid\Communication\CustomGridCommunicationFactory getFactory() * @method \Pyz\Zed\CustomGrid\Persistence\CustomGridQueryContainer getQueryContainer() */ class IndexController extends AbstractController { /** * @return array */ public function indexAction(): array { $table = $this->getFactory()->customGridQuery(); return [ 'table' => $table->render(), ]; } /** * @return \Symfony\Component\HttpFoundation\JsonResponse */ public function tableAction(): JsonResponse { $table = $this->getFactory()->customGridQuery(); return $this->jsonResponse( $table->fetchData(), ); } } |
Step 4:Create Form files
your-spryker-project/src/Pyz/Zed/CustomGrid/Communication/Form/CustomGridCreateForm.php
|
1 2 3 4 5 6 7 8 9 10 11 12 13 14 15 16 17 18 19 20 21 22 23 24 25 26 27 28 29 30 31 32 33 34 35 36 37 38 39 40 41 42 43 44 45 46 47 48 49 50 51 52 53 54 55 56 57 58 59 60 61 62 63 64 65 66 67 68 69 70 71 72 73 74 75 76 77 78 79 80 81 82 83 84 85 86 87 88 89 90 91 92 93 94 95 96 97 98 99 |
<?php /** * This file is part of the Spryker Commerce OS. * For full license information, please view the LICENSE file that was distributed with this source code. */ namespace Pyz\Zed\CustomGrid\Communication\Form; use Spryker\Zed\Kernel\Communication\Form\AbstractType; use Symfony\Component\Form\Extension\Core\Type\TextType; use Symfony\Component\Form\FormBuilderInterface; use Symfony\Component\Validator\Constraints\NotBlank; use Symfony\Component\Validator\Constraints\Regex; /** * @method \Pyz\Zed\CustomGrid\Communication\CustomGridCommunicationFactory getFactory() * @method \Pyz\Zed\CustomGrid\Business\CustomGridFacadeInterface getFacade() * @method \Pyz\Zed\CustomGrid\NgGridConfig getConfig() */ class CustomGridCreateForm extends AbstractType { /** * @var string */ public const FIELD_NAME = 'title'; /** * @var string */ public const FIELD_DESCRIPTION = 'description'; /** * @return string */ public function getBlockPrefix(): string { return 'custom_grid'; } /** * @param \Symfony\Component\Form\FormBuilderInterface $builder * @param array<string, mixed> $options * * @return void */ public function buildForm(FormBuilderInterface $builder, array $options) { $this->addTitleField($builder) ->addDescriptionField($builder); } /** * Creates title field in the form. * * @param \Symfony\Component\Form\FormBuilderInterface $builder * * @return $this */ protected function addTitleField(FormBuilderInterface $builder) { $builder->add(static::FIELD_NAME, TextType::class, [ 'label' => 'Title', 'constraints' => [ $this->createNotBlankConstraint(), ], ]); return $this; } /** * Creates description field in the form. * * @param \Symfony\Component\Form\FormBuilderInterface $builder * * @return $this */ protected function addDescriptionField(FormBuilderInterface $builder) { $builder->add(static::FIELD_DESCRIPTION, TextType::class, [ 'label' => 'Description', 'constraints' => [ $this->createNotBlankConstraint(), ], ]); return $this; } /** * Creates constraint for field being non blank. * * @return \Symfony\Component\Validator\Constraints\NotBlank */ protected function createNotBlankConstraint(): NotBlank { return new NotBlank(); } } |
your-spryker-project/src/Pyz/Zed/CustomGrid/Communication/Form/CustomGridEditForm.php
|
1 2 3 4 5 6 7 8 9 10 11 12 13 14 15 16 17 18 19 20 21 22 23 24 25 26 27 28 29 30 31 32 33 34 35 36 37 38 39 40 41 42 43 44 45 46 47 48 49 50 51 52 53 54 55 56 57 58 59 60 61 62 63 64 65 66 67 68 69 70 71 72 73 74 75 76 77 78 79 80 81 82 83 84 85 86 87 88 89 90 91 92 93 94 95 96 97 98 99 |
<?php /** * This file is part of the Spryker Commerce OS. * For full license information, please view the LICENSE file that was distributed with this source code. */ namespace Pyz\Zed\CustomGrid\Communication\Form; use Spryker\Zed\Kernel\Communication\Form\AbstractType; use Symfony\Component\Form\Extension\Core\Type\TextType; use Symfony\Component\Form\FormBuilderInterface; use Symfony\Component\Validator\Constraints\NotBlank; use Symfony\Component\Validator\Constraints\Regex; /** * @method \Pyz\Zed\CustomGrid\Communication\CustomGridCommunicationFactory getFactory() * @method \Pyz\Zed\CustomGrid\Business\CustomGridFacadeInterface getFacade() * @method \Pyz\Zed\CustomGrid\NgGridConfig getConfig() */ class CustomGridEditForm extends AbstractType { /** * @var string */ public const FIELD_NAME = 'title'; /** * @var string */ public const FIELD_DESCRIPTION = 'description'; /** * @return string */ public function getBlockPrefix(): string { return 'custom_grid'; } /** * @param \Symfony\Component\Form\FormBuilderInterface $builder * @param array<string, mixed> $options * * @return void */ public function buildForm(FormBuilderInterface $builder, array $options) { $this->addTitleField($builder) ->addDescriptionField($builder); } /** * Creates title field in the form. * * @param \Symfony\Component\Form\FormBuilderInterface $builder * * @return $this */ protected function addTitleField(FormBuilderInterface $builder) { $builder->add(static::FIELD_NAME, TextType::class, [ 'label' => 'Title', 'constraints' => [ $this->createNotBlankConstraint(), ], ]); return $this; } /** * Creates description field in the form. * * @param \Symfony\Component\Form\FormBuilderInterface $builder * * @return $this */ protected function addDescriptionField(FormBuilderInterface $builder) { $builder->add(static::FIELD_DESCRIPTION, TextType::class, [ 'label' => 'Description', 'constraints' => [ $this->createNotBlankConstraint(), ], ]); return $this; } /** * Creates constraint for field being non blank. * * @return \Symfony\Component\Validator\Constraints\NotBlank */ protected function createNotBlankConstraint(): NotBlank { return new NotBlank(); } } |
your-spryker-project/src/Pyz/Zed/CustomGrid/Communication/Form/CustomGridEditForm.php
|
1 2 3 4 5 6 7 8 9 10 11 12 13 14 15 16 17 18 19 20 21 22 23 24 25 26 27 28 29 30 31 32 33 34 35 36 37 38 39 40 41 42 43 44 45 46 47 48 49 50 51 52 53 54 55 56 57 58 59 60 61 62 63 64 65 66 67 68 69 70 71 72 73 74 75 76 77 78 79 80 81 82 83 84 85 86 87 88 89 90 91 92 93 94 95 96 97 98 99 100 101 102 103 104 105 106 107 108 109 110 111 112 113 114 115 116 117 118 119 120 121 122 123 124 125 126 127 128 129 130 131 132 133 134 135 136 137 138 139 140 141 142 143 144 145 146 147 148 149 150 151 152 153 154 155 156 157 158 159 160 161 162 163 164 165 166 167 168 169 170 171 172 173 174 175 176 177 178 179 180 181 182 183 184 185 186 187 188 189 190 191 192 193 194 195 196 197 |
<?php /** * This file is part of the Spryker Commerce OS. * For full license information, please view the LICENSE file that was distributed with this source code. */ namespace Pyz\Zed\CustomGrid\Communication\Form; use Spryker\Zed\Kernel\Communication\Form\AbstractType; use Symfony\Component\Form\Extension\Core\Type\TextType; use Symfony\Component\Form\FormBuilderInterface; use Symfony\Component\Validator\Constraints\NotBlank; use Symfony\Component\Validator\Constraints\Regex; /** * @method \Pyz\Zed\CustomGrid\Communication\CustomGridCommunicationFactory getFactory() * @method \Pyz\Zed\CustomGrid\Business\CustomGridFacadeInterface getFacade() * @method \Pyz\Zed\CustomGrid\NgGridConfig getConfig() */ class CustomGridEditForm extends AbstractType { /** * @var string */ public const FIELD_NAME = 'title'; /** * @var string */ public const FIELD_DESCRIPTION = 'description'; /** * @return string */ public function getBlockPrefix(): string { return 'custom_grid'; } /** * @param \Symfony\Component\Form\FormBuilderInterface $builder * @param array<string, mixed> $options * * @return void */ public function buildForm(FormBuilderInterface $builder, array $options) { $this->addTitleField($builder) ->addDescriptionField($builder); } /** * Creates title field in the form. * * @param \Symfony\Component\Form\FormBuilderInterface $builder * * @return $this */ protected function addTitleField(FormBuilderInterface $builder) { $builder->add(static::FIELD_NAME, TextType::class, [ 'label' => 'Title', 'constraints' => [ $this->createNotBlankConstraint(), ], ]); return $this; } /** * Creates description field in the form. * * @param \Symfony\Component\Form\FormBuilderInterface $builder * * @return $this */ protected function addDescriptionField(FormBuilderInterface $builder) { $builder->add(static::FIELD_DESCRIPTION, TextType::class, [ 'label' => 'Description', 'constraints' => [ $this->createNotBlankConstraint(), ], ]); return $this; } /** * Creates constraint for field being non blank. * * @return \Symfony\Component\Validator\Constraints\NotBlank */ protected function createNotBlankConstraint(): NotBlank { return new NotBlank(); } } |
Step 5:Create Table files
your-spryker-project/src/Pyz/Zed/CustomGrid/Communication/Table/CustomGridData.php
|
1 2 3 4 5 6 7 8 9 10 11 12 13 14 15 16 17 18 19 20 21 22 23 24 25 26 27 28 29 30 31 32 33 34 35 36 37 38 39 40 41 42 43 44 45 46 47 48 49 50 51 52 53 54 55 56 57 58 59 60 61 62 63 64 65 66 67 68 69 70 71 72 73 74 75 76 77 78 79 80 81 82 83 84 85 86 87 88 89 90 91 92 93 94 95 96 97 98 99 100 101 102 103 104 105 106 107 108 109 110 111 112 113 114 115 116 117 118 119 120 121 122 123 124 125 126 127 128 129 130 131 132 133 134 135 136 137 138 139 140 141 142 143 144 145 146 147 148 149 150 151 152 153 154 155 156 157 158 159 160 161 162 163 164 165 166 167 168 169 170 171 172 173 174 175 |
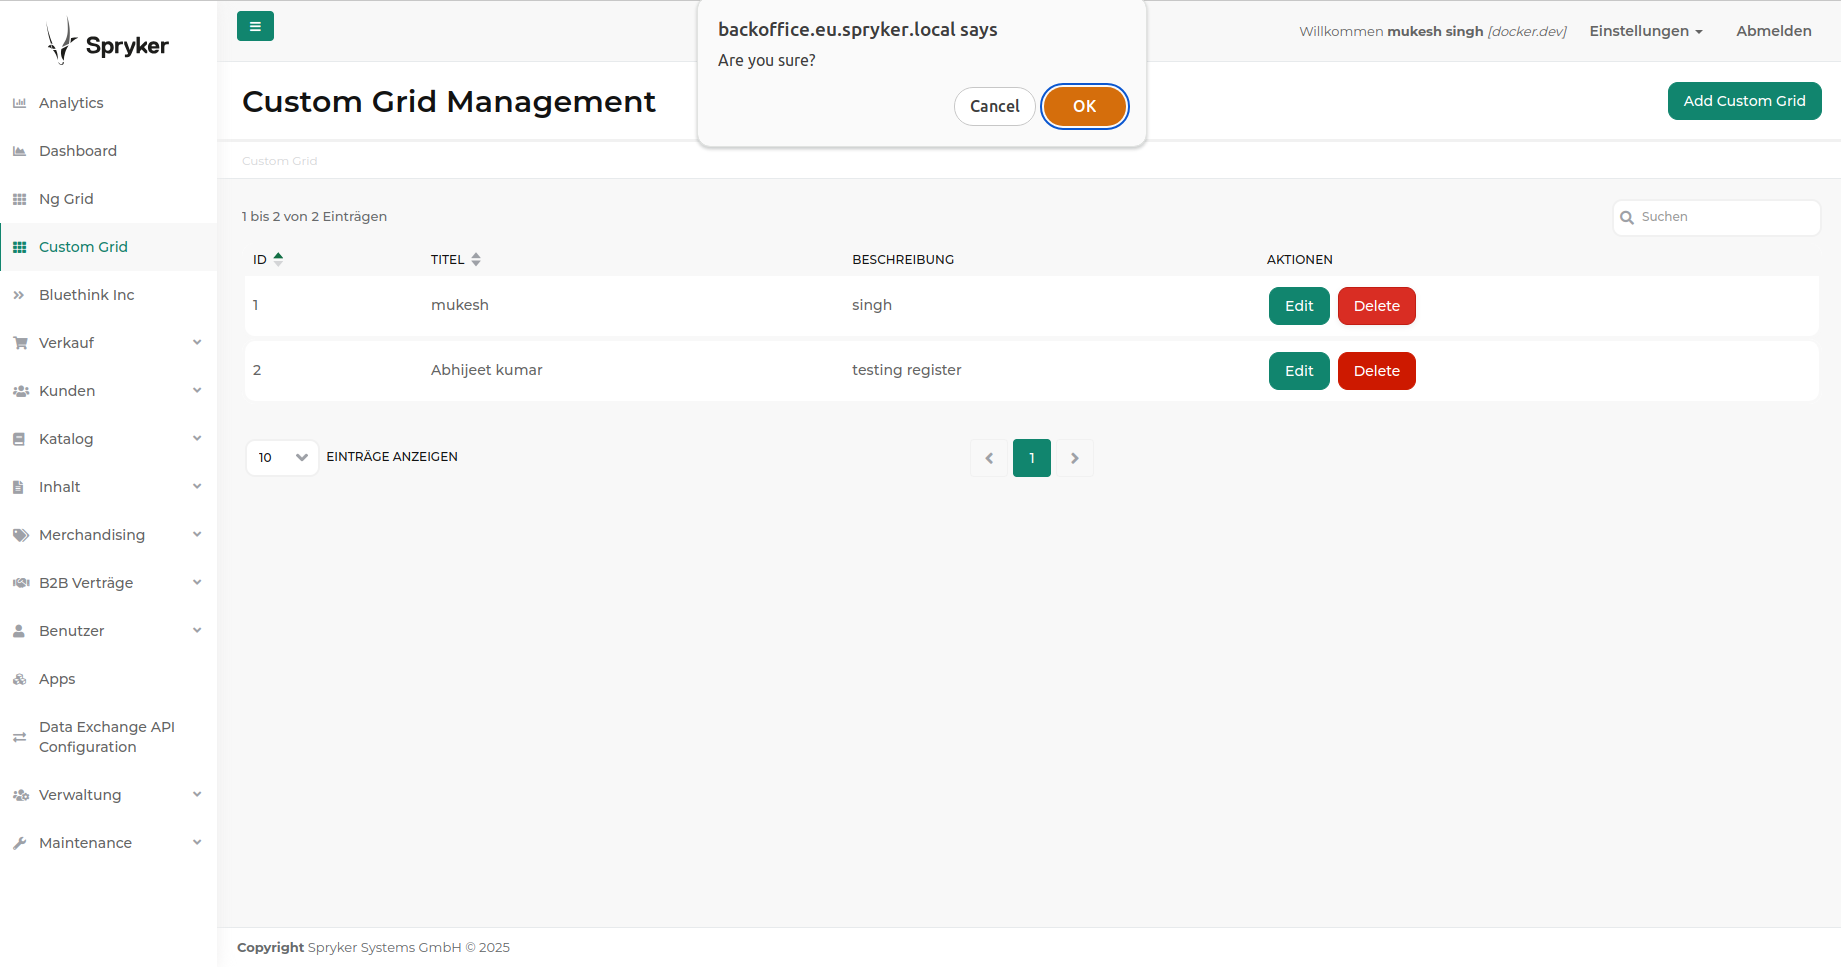
<?php namespace Pyz\Zed\CustomGrid\Communication\Table; use Orm\Zed\CustomGrid\Persistence\CustomGridQuery; use Spryker\Zed\Gui\Communication\Table\AbstractTable; use Spryker\Zed\Gui\Communication\Table\TableConfiguration; class CustomGridData extends AbstractTable { /** * @var \Orm\Zed\CustomGrid\Persistence\CustomGridQuery */ protected $customGridQuery; /** * @param \Orm\Zed\CustomGrid\Persistence\CustomGridQuery $customGridQuery */ public function __construct(CustomGridQuery $customGridQuery) { $this->customGridQuery = $customGridQuery; } /** * @param \Spryker\Zed\Gui\Communication\Table\TableConfiguration $config * * @return \Spryker\Zed\Gui\Communication\Table\TableConfiguration */ protected function configure(TableConfiguration $config): TableConfiguration { $config->setHeader([ 'id' => 'ID', 'title' => 'Title', 'description' => 'Description', 'actions' => 'Actions', // New actions column ]); $config->setSortable(['id', 'title']); $config->setSearchable(['title']); $config->setRawColumns(['description', 'actions']); // Allows HTML in the "description" column return $config; } /** * @param \Spryker\Zed\Gui\Communication\Table\TableConfiguration $config * * @return array */ protected function prepareData(TableConfiguration $config): array { $query = $this->customGridQuery; $tableRows = []; foreach ($this->runQuery($query, $config, true) as $entity) { $tableRows[] = [ 'id' => $entity->getId() ?? null, 'title' => $entity->getTitle() ?? null, 'description' => $entity->getDescription() ?? null, 'actions' => $this->createActionButtons($entity->getId()), ]; } return $tableRows; } protected function createActionButtons($id): string { $editUrl = "/custom-grid/edit?id={$id}"; // Link to the edit page $deleteUrl = "/custom-grid/delete?id={$id}"; // Link to the delete action // Create a form for the delete button that sends a POST request with DELETE method $deleteForm = sprintf( '<form action="%s" method="POST" style="display:inline;"> <input type="hidden" name="_method" value="DELETE"> <button type="submit" class="btn btn-danger" onclick="return confirm(\'Are you sure?\')">Delete</button> </form>', $deleteUrl ); return sprintf( '<a href="%s" class="btn btn-primary">Edit</a> %s', // Edit button + delete form $editUrl, $deleteForm ); } } |
Step 6:Modify this file
your-spryker-project/src/Pyz/Zed/CustomGrid/Communication/CustomGridCommunicationFactory.php
|
1 2 3 4 5 6 7 8 9 10 11 12 13 14 15 16 17 18 19 20 21 22 23 24 25 26 27 28 29 30 31 32 33 34 35 36 37 38 39 40 41 42 43 44 45 46 47 48 49 50 51 52 53 54 55 56 57 58 59 60 61 62 63 64 65 66 67 68 69 70 71 72 73 74 75 76 77 78 79 80 81 82 83 84 85 86 87 88 89 90 91 92 93 94 95 96 97 98 99 100 101 102 103 104 105 106 107 108 109 110 111 112 113 114 115 116 117 118 119 120 121 122 123 124 125 126 127 128 129 130 131 132 133 134 135 136 137 138 139 140 141 |
<?php /** * This file is part of the Spryker Commerce OS. * For full license information, please view the LICENSE file that was distributed with this source code. */ namespace Pyz\Zed\CustomGrid\Communication; use Generated\Shared\Transfer\CustomGridTransfer; use Orm\Zed\CustomGrid\Persistence\CustomGridQuery; use Pyz\Zed\CustomGrid\Business\CustomGridFacadeInterface; use Pyz\Zed\CustomGrid\Communication\Form\CustomGridCreateForm; use Pyz\Zed\CustomGrid\Communication\Form\CustomGridEditForm; use Pyz\Zed\CustomGrid\Communication\Table\CustomGridData; use Pyz\Zed\CustomGrid\CustomGridDependencyProvider; use Spryker\Zed\Kernel\Communication\AbstractCommunicationFactory; use Symfony\Component\Form\FormInterface; /** * @method \Pyz\Zed\CustomGrid\CustomGridGridConfig getConfig() * @method \Pyz\Zed\CustomGrid\Business\CustomGridFacadeInterface getFacade() * @method \Pyz\Zed\CustomGrid\Persistence\CustomGridEntityManagerInterface getEntityManager() */ class CustomGridCommunicationFactory extends AbstractCommunicationFactory { /** * @return \Pyz\Zed\CustomGrid\Communication\Table\CustomGridData */ public function customGridQuery(): CustomGridData { return new CustomGridData($this->getCustomGridDataQuery()); } /** * @return \Orm\Zed\CustomGrid\Persistence\CustomGridQuery */ protected function getCustomGridDataQuery(): CustomGridQuery { return $this->getProvidedDependency(CustomGridDependencyProvider::PROPEL_QUERY_CUSTOM_GRID); } /** * @param \Generated\Shared\Transfer\CustomGridTransfer $customGridTransfer * * @return \Symfony\Component\Form\FormInterface */ public function createCustomGridCreateForm(CustomGridTransfer $customGridTransfer, array $options = []): FormInterface { return $this->getFormFactory()->create(CustomGridCreateForm::class, $customGridTransfer, $options); } /** * @param \Generated\Shared\Transfer\CustomGridTransfer $customGridTransfer * * @return \Symfony\Component\Form\FormInterface */ public function createCustomGridEditForm(CustomGridTransfer $customGridTransfer, array $options = []): FormInterface { return $this->getFormFactory()->create(CustomGridEditForm::class, $customGridTransfer, $options); } /** * @return \Pyz\Zed\NgGrid\Business\CustomGridFacadeInterface */ public function getCustomGridFacade(): CustomGridFacadeInterface { return $this->getProvidedDependency(CustomGridDependencyProvider::FACADE_CUSTOM_GRID); } } |
Step 7:Create Business files and modify
your-spryker-project/src/Pyz/Zed/CustomGrid/Business/CustomGridBusinessFactory.php
|
1 2 3 4 5 6 7 8 9 10 11 12 13 14 15 16 17 18 19 20 21 22 23 24 25 26 27 28 29 30 31 32 33 34 35 36 37 38 39 40 41 42 43 44 45 46 47 48 49 50 51 52 53 54 55 56 57 |
<?php /** * This file is part of the Spryker Commerce OS. * For full license information, please view the LICENSE file that was distributed with this source code. */ namespace Pyz\Zed\CustomGrid\Business; use Pyz\Zed\CustomGrid\Business\Writer\CustomGridWriter; use Spryker\Zed\Kernel\Business\AbstractBusinessFactory; /** * @method \Pyz\Zed\CustomGrid\NgGridConfig getConfig() * @method \Pyz\Zed\CustomGrid\Persistence\CustomGridQueryContainer getQueryContainer() * @method \Pyz\Zed\CustomGrid\Persistence\CustomGridEntityManagerInterface getEntityManager() */ class CustomGridBusinessFactory extends AbstractBusinessFactory { /** * @return \Pyz\Zed\CustomGrid\Business\Writer\CustomGridWriter */ public function createCustomGridWriter(): CustomGridWriter { return new CustomGridWriter( $this->getEntityManager(), ); } } |
your-spryker-project/src/Pyz/Zed/CustomGrid/Business/CustomGridFacade.php
|
1 2 3 4 5 6 7 8 9 10 11 12 13 14 15 16 17 18 19 20 21 22 23 24 25 26 27 28 29 30 31 32 33 34 35 36 37 38 39 40 41 42 43 44 45 46 47 48 49 50 51 52 53 54 55 56 57 58 59 60 61 62 63 64 65 66 67 68 69 70 71 72 73 74 75 76 77 78 79 80 81 82 83 84 85 86 87 88 89 90 91 92 93 94 95 96 97 98 99 100 101 102 103 104 105 106 107 108 109 110 111 112 113 |
<?php /** * This file is part of the Spryker Commerce OS. * For full license information, please view the LICENSE file that was distributed with this source code. */ namespace Pyz\Zed\CustomGrid\Business; use Generated\Shared\Transfer\CustomGridTransfer; use Spryker\Zed\Kernel\Business\AbstractFacade; /** * @method \Pyz\Zed\CustomGrid\Business\CustomGridBusinessFactory getFactory() * @method \Pyz\Zed\CustomGrid\Persistence\CustomGridEntityManagerInterface getEntityManager() */ class CustomGridFacade extends AbstractFacade implements CustomGridFacadeInterface { /** * @param \Generated\Shared\Transfer\CustomGridTransfer $customGridTransfer * * @return \Generated\Shared\Transfer\CustomGridTransfer */ public function createCustomGrid(CustomGridTransfer $customGridTransfer): CustomGridTransfer { return $this->getFactory() ->createCustomGridWriter() ->create($customGridTransfer); } /** * Deletes a Custom Grid entry. * * @param \Generated\Shared\Transfer\CustomGridTransfer $customGridTransfer * * @return \Generated\Shared\Transfer\CustomGridTransfer */ public function deleteCustomGrid(CustomGridTransfer $customGridTransfer): void { $this->getEntityManager()->deleteCustomGrid($customGridTransfer); } public function findCustomGridById(int $id): ?CustomGridTransfer { return $this->getEntityManager()->findCustomGridById($id); } /** * Updates an existing Custom Grid. * * @param \Generated\Shared\Transfer\CustomGridTransfer $customGridTransfer * * @return \Generated\Shared\Transfer\CustomGridTransfer */ public function updateCustomGrid(CustomGridTransfer $customGridTransfer): CustomGridTransfer { // Call the entity manager to update the custom grid return $this->getEntityManager()->updateCustomGrid($customGridTransfer); } } |
your-spryker-project/src/Pyz/Zed/CustomGrid/Business/CustomGridFacadeInterface.php
|
1 2 3 4 5 6 7 8 9 10 11 12 13 14 15 16 17 18 19 20 21 22 23 24 25 26 27 28 29 30 31 32 33 34 35 36 37 38 39 40 41 42 43 44 45 46 47 48 49 50 51 52 53 54 55 56 57 58 59 60 61 62 63 64 65 66 67 68 69 70 71 72 73 74 75 76 77 78 79 |
<?php /** * This file is part of the Spryker Commerce OS. * For full license information, please view the LICENSE file that was distributed with this source code. */ namespace Pyz\Zed\CustomGrid\Business; use Generated\Shared\Transfer\CustomGridTransfer; interface CustomGridFacadeInterface { /** * Specification: * - Creates a new custom_grid into the database * * @api * * @param \Generated\Shared\Transfer\CustomGridTransfer $customGridTransfer * * @return \Generated\Shared\Transfer\CustomGridTransfer */ public function createCustomGrid(CustomGridTransfer $customGridTransfer): CustomGridTransfer; /** * Deletes a CustomGrid entry. * * @param \Generated\Shared\Transfer\CustomGridTransfer $customGridTransfer * * @return void */ public function deleteCustomGrid(CustomGridTransfer $customGridTransfer): void; /** * Update a custom grid entity. * * @param \Generated\Shared\Transfer\CustomGridTransfer $customGridTransfer */ public function updateCustomGrid(CustomGridTransfer $customGridTransfer); } |
your-spryker-project/src/Pyz/Zed/CustomGrid/Business/Writer/CustomGridWriter.php
|
1 2 3 4 5 6 7 8 9 10 11 12 13 14 15 16 17 18 19 20 21 22 23 24 25 26 27 28 29 30 31 32 33 34 35 36 37 38 39 40 41 42 43 44 45 46 47 48 49 50 51 52 53 54 55 56 57 58 59 60 61 62 63 64 65 |
<?php /** * This file is part of the Spryker Commerce OS. * For full license information, please view the LICENSE file that was distributed with this source code. */ namespace Pyz\Zed\CustomGrid\Business\Writer; use Generated\Shared\Transfer\CustomGridTransfer; use Pyz\Zed\CustomGrid\Persistence\CustomGridEntityManagerInterface; class CustomGridWriter { /** * Constructor for CustomGridWriter * * @param \Pyz\Zed\CustomGrid\Persistence\CustomGridEntityManagerInterface $customGridEntityManager */ public function __construct(protected CustomGridEntityManagerInterface $customGridEntityManager) { } /** * @param \Generated\Shared\Transfer\CusomGridTransfer $customGridTransfer * * @return \Generated\Shared\Transfer\CustomGridTransfer */ public function create(CustomGridTransfer $customGridTransfer): CustomGridTransfer { return $this->customGridEntityManager->createCustomGrid($customGridTransfer); } } |
Step 8: Create Persistence files and modify
your-spryker-project/src/Pyz/Zed/CustomGrid/Persistence/CustomGridEntityManager.php
|
1 2 3 4 5 6 7 8 9 10 11 12 13 14 15 16 17 18 19 20 21 22 23 24 25 26 27 28 29 30 31 32 33 34 35 36 37 38 39 40 41 42 43 44 45 46 47 48 49 50 51 52 53 54 55 56 57 58 59 60 61 62 63 64 65 66 67 68 69 70 71 72 73 74 75 76 77 78 79 80 81 82 83 84 85 86 87 88 89 90 91 92 93 94 95 96 97 98 99 100 101 102 103 104 105 106 107 108 109 110 111 112 113 114 115 116 117 118 119 120 121 122 123 124 125 126 127 128 129 130 131 132 133 134 135 136 137 138 139 140 141 142 143 144 145 146 147 148 149 150 151 152 153 154 155 156 157 158 159 160 161 162 163 164 165 166 167 168 169 170 171 172 173 174 175 176 177 178 179 180 181 182 183 184 185 186 187 188 189 190 191 192 193 194 195 196 197 198 199 200 201 202 203 204 205 |
<?php /** * This file is part of the Spryker Commerce OS. * For full license information, please view the LICENSE file that was distributed with this source code. */ namespace Pyz\Zed\CustomGrid\Persistence; use Generated\Shared\Transfer\CustomGridTransfer; use Orm\Zed\CustomGrid\Persistence\CustomGrid; use Orm\Zed\CustomGrid\Persistence\CustomGridQuery; use Spryker\Zed\Kernel\Persistence\AbstractEntityManager; /** * @method \Pyz\Zed\CustomGrid\Persistence\CustomGridPersistenceFactory getFactory() */ class CustomGridEntityManager extends AbstractEntityManager implements CustomGridEntityManagerInterface { /** * Creates a table structure for CUSTOM Grid backoffice * * @param \Generated\Shared\Transfer\CustomGridTransfer $customGridTransfer * * @return \Generated\Shared\Transfer\CustomGridTransfer */ public function createCustomGrid(CustomGridTransfer $customGridTransfer): CustomGridTransfer { $customGridEntity = new CustomGrid(); $customGridEntity->fromArray($customGridTransfer->modifiedToArray()); $customGridEntity->save(); return $customGridTransfer->fromArray($customGridEntity->toArray(), true); } /** * Deletes a Custom Grid entry. * * @param \Generated\Shared\Transfer\CustomGridTransfer $customGridTransfer * * @return void */ public function deleteCustomGrid(CustomGridTransfer $customGridTransfer): void { // Perform the delete operation using CustomGridQuery CustomGridQuery::create() ->filterById($customGridTransfer->getId()) // Filter by the CustomGrid ID ->delete(); // Delete the record } public function findCustomGridById(int $id): ?CustomGridTransfer { $customGridEntity = CustomGridQuery::create() ->filterById($id) ->findOne(); // Find a single record by ID if ($customGridEntity === null) { return null; // Return null if no entity is found } return (new CustomGridTransfer())->fromArray($customGridEntity->toArray(), true); } /** * Updates an existing Custom Grid in the database. * * @param \Generated\Shared\Transfer\CustomGridTransfer $customGridTransfer * * @return \Generated\Shared\Transfer\CustomGridTransfer */ public function updateCustomGrid(CustomGridTransfer $customGridTransfer): CustomGridTransfer { // Find the existing entity by ID $customGridEntity = $this->findCustomGridByIdupdate($customGridTransfer->getId()); if ($customGridEntity === null) { // Handle the case where the entity is not found throw new \Exception('Custom grid with ID ' . $customGridTransfer->getId() . ' not found.'); } // Update the fields of the entity with the data from the transfer object $customGridEntity->fromArray($customGridTransfer->toArray()); // Save the updated entity back to the database $customGridEntity->save(); // Save operation is called on the entity, NOT the transfer object // Return the updated CustomGridTransfer // Optionally: Reload the transfer object from the entity to get the latest data return $customGridTransfer->fromArray($customGridEntity->toArray(), true); } /** * Finds a CustomGrid entity by its ID. * * @param int $id * * @return \Orm\Zed\CustomGrid\Persistence\CustomGrid|null */ protected function findCustomGridByIdupdate(int $id) { // Assuming you're using Propel ORM; adapt this code if you're using another ORM. return CustomGridQuery::create()->findOneById($id); } } |
your-spryker-project/src/Pyz/Zed/CustomGrid/Persistence/CustomGridEntityManagerInterface.php
|
1 2 3 4 5 6 7 8 9 10 11 12 13 14 15 16 17 18 19 20 21 22 23 24 25 26 27 28 29 30 31 32 33 34 35 36 37 38 39 40 41 42 43 |
<?php /** * This file is part of the Spryker Commerce OS. * For full license information, please view the LICENSE file that was distributed with this source code. */ namespace Pyz\Zed\CustomGrid\Persistence; use Generated\Shared\Transfer\CustomGridTransfer; interface CustomGridEntityManagerInterface { /** * Creates a table structure for CUSTOM Grid backoffice * * @param \Generated\Shared\Transfer\CustomGridTransfer $customGridTransfer * * @return \Generated\Shared\Transfer\CustomGridTransfer */ public function createCustomGrid(CustomGridTransfer $customGridTransfer): CustomGridTransfer; } |
your-spryker-project/src/Pyz/Zed/CustomGrid/Persistence/Propel/Schema/pyz_custom_grid.schema.xml
|
1 2 3 4 5 6 7 8 9 10 11 12 13 14 15 16 17 18 19 20 21 22 23 24 25 26 27 28 29 30 31 |
<?xml version="1.0"?> <database xmlns:xsi="http://www.w3.org/2001/XMLSchema-instance" name="zed" xsi:noNamespaceSchemaLocation="http://static.spryker.com/schema-01.xsd" namespace="Orm\Zed\CustomGrid\Persistence" package="src.Orm.Zed.CustomGrid.Persistence"> <!-- TODO define your tables here --> <table name="custom_grid" idMethod="native"> <!-- Primary key --> <column name="id" required="true" type="INTEGER" autoIncrement="true" primaryKey="true"/> <!-- General attributes --> <column name="title" required="true" type="VARCHAR" size="255"/> <column name="description" required="false" type="LONGVARCHAR"/> </table> </database> |
Step 9:Create Presentation files and modify
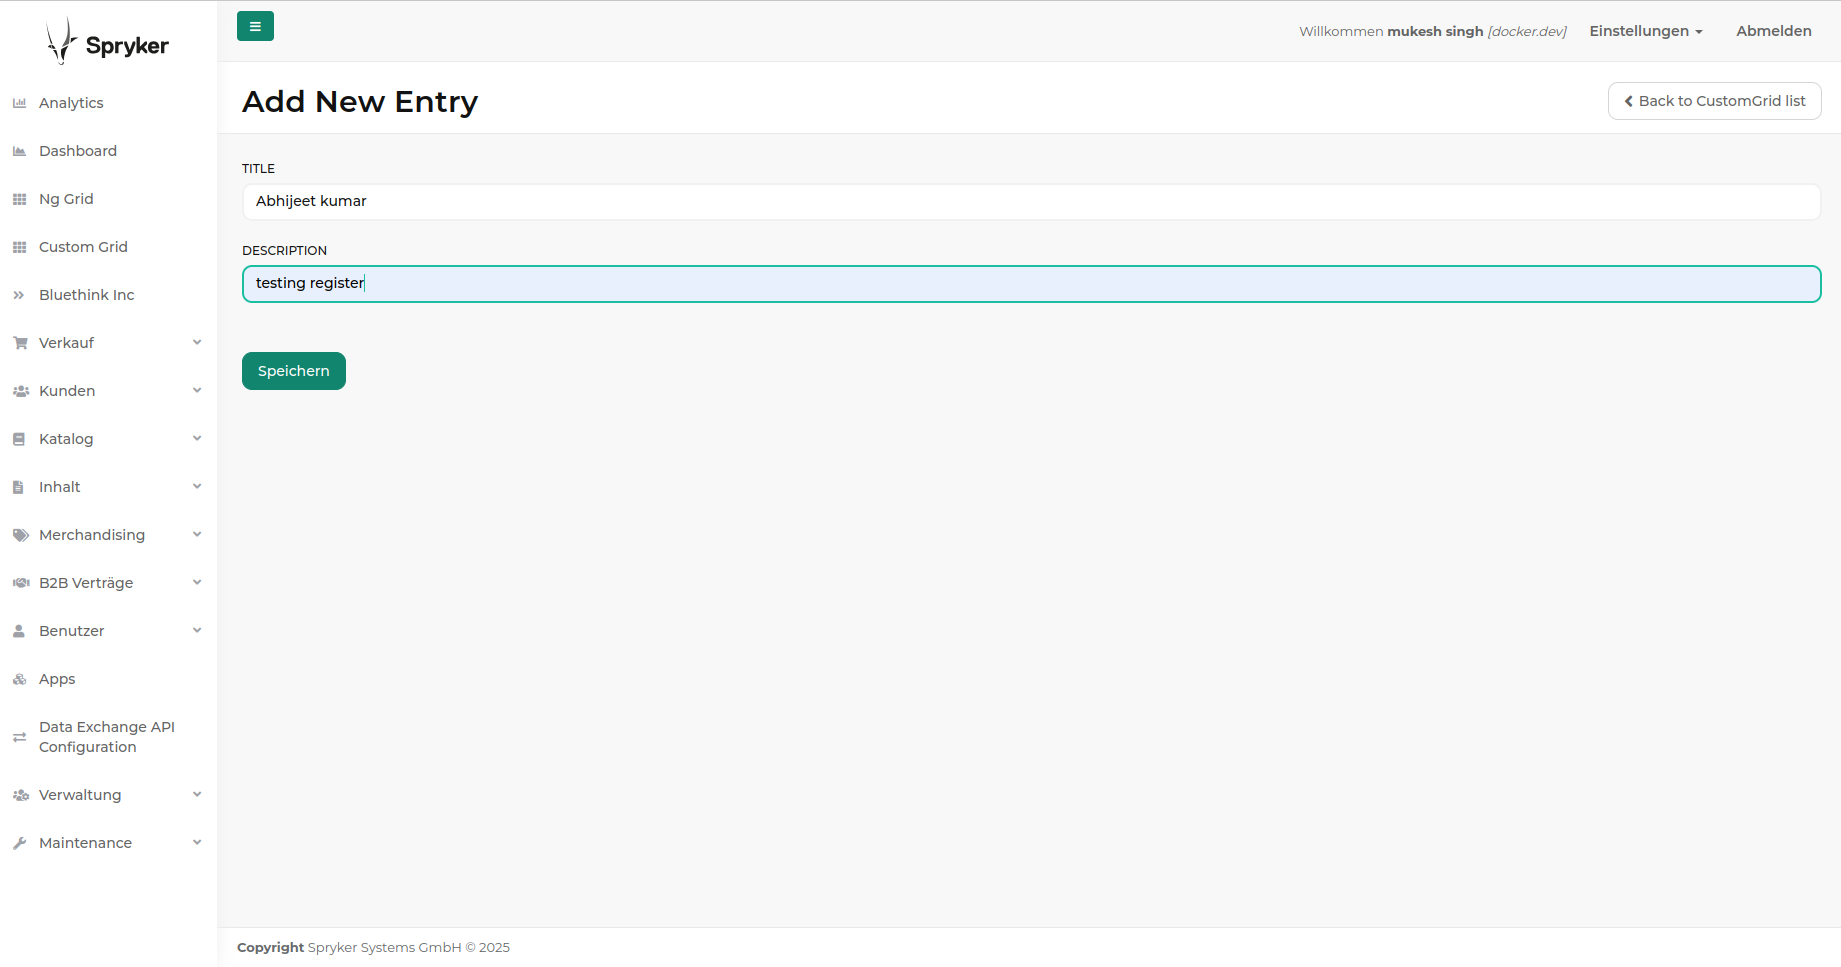
your-spryker-project/src/Pyz/Zed/CustomGrid/Presentation/Add/index.twig
|
1 2 3 4 5 6 7 8 9 10 11 12 13 14 15 16 17 18 19 20 21 22 23 24 25 26 27 28 29 30 31 32 33 34 35 36 37 38 39 40 41 42 43 44 45 46 47 48 49 50 51 52 53 54 55 56 57 58 59 60 61 62 63 64 65 66 67 68 69 70 71 72 73 74 75 76 77 78 79 80 81 82 83 84 85 86 87 88 89 90 91 92 93 |
{% extends '@Gui/Layout/layout.twig' %} {% if widget_title is not defined %} {% set widget_title = 'Add New Entry' | trans %} {% endif %} {% if submit_title is not defined %} {% set submit_title = 'Save' | trans %} {% endif %} {% block section_title %}{{ widget_title }}{% endblock %} {% block action %} {{ backActionButton(backUrl, 'Back to CustomGrid list' | trans) }} {% endblock %} {% block content %} {{ form_start(custom_gridCreateForm, { 'attr': {'class': 'kv_autocomplete_form'} }) }} {{ form_errors(custom_gridCreateForm) }} {# Loop through each form field and display its name #} {% for field in custom_gridCreateForm %} <div class="form-group"> <label for="{{ field.vars.id }}">{{ field.vars.label }}</label> {{ form_widget(field) }} </div> {% endfor %} <input type="submit" class="btn btn-primary safe-submit" value="{{ submit_title }}" /> {{ form_end(custom_gridCreateForm) }} {% endblock %} {% block head_css %} {{ parent() }} <link rel="stylesheet" href="{{ assetsPath('css/spryker-zed-productmanagement-main.css') }}" /> {% endblock %} {% block footer_js %} {{ parent() }} <script src="{{ assetsPath('js/spryker-zed-productmanagement-main.js') }}"></script> {% endblock %} |
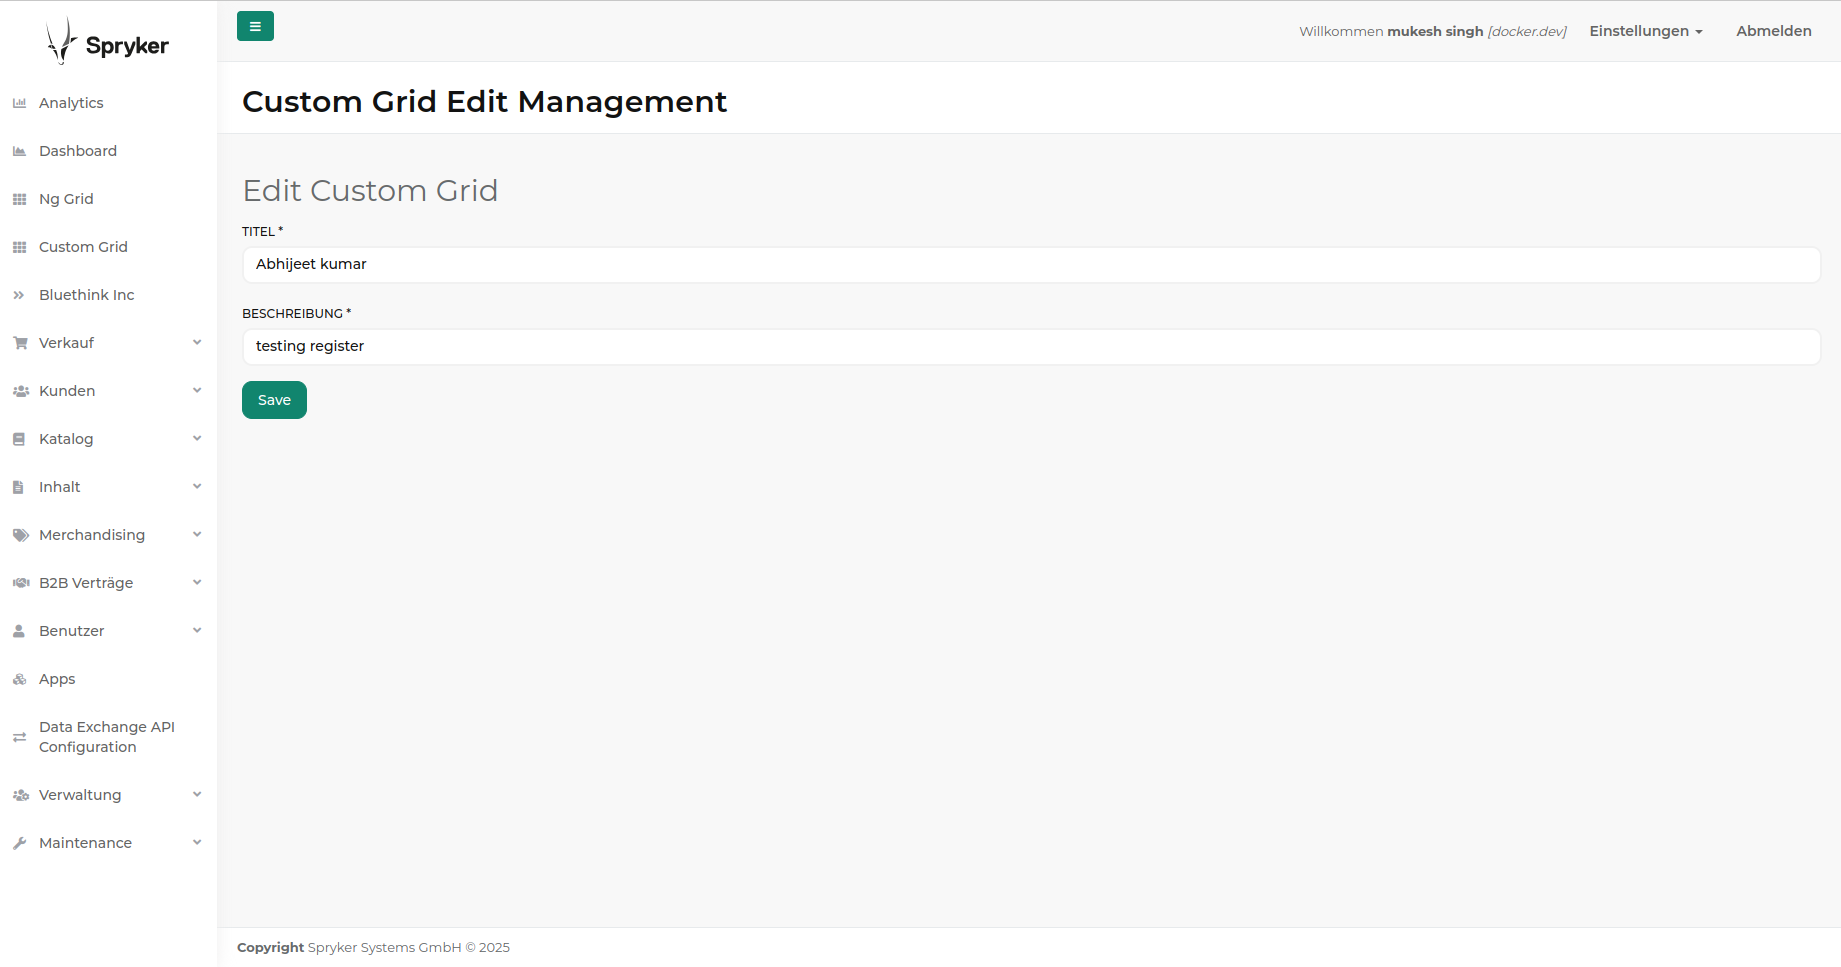
your-spryker-project/src/Pyz/Zed/CustomGrid/Presentation/Edit/index.twig
|
1 2 3 4 5 6 7 8 9 10 11 12 13 14 15 16 17 18 19 20 21 22 23 24 25 26 27 28 29 |
{% extends '@Gui/Layout/layout.twig' %} {% set widget_title = 'Custom Grid Edit Management' | trans %} {% block section_title %}{{ widget_title }}{% endblock %} {% block content %} <h1>Edit Custom Grid</h1> <form action="/custom-grid/edit?id={{entity.id}}" method="post"> {{ form_start(form) }} {{ form_row(form.title) }} {{ form_row(form.description) }} <button class="btn btn-primary safe-submit" type="submit">Save</button> {{ form_end(form) }} </form> {% endblock %} |
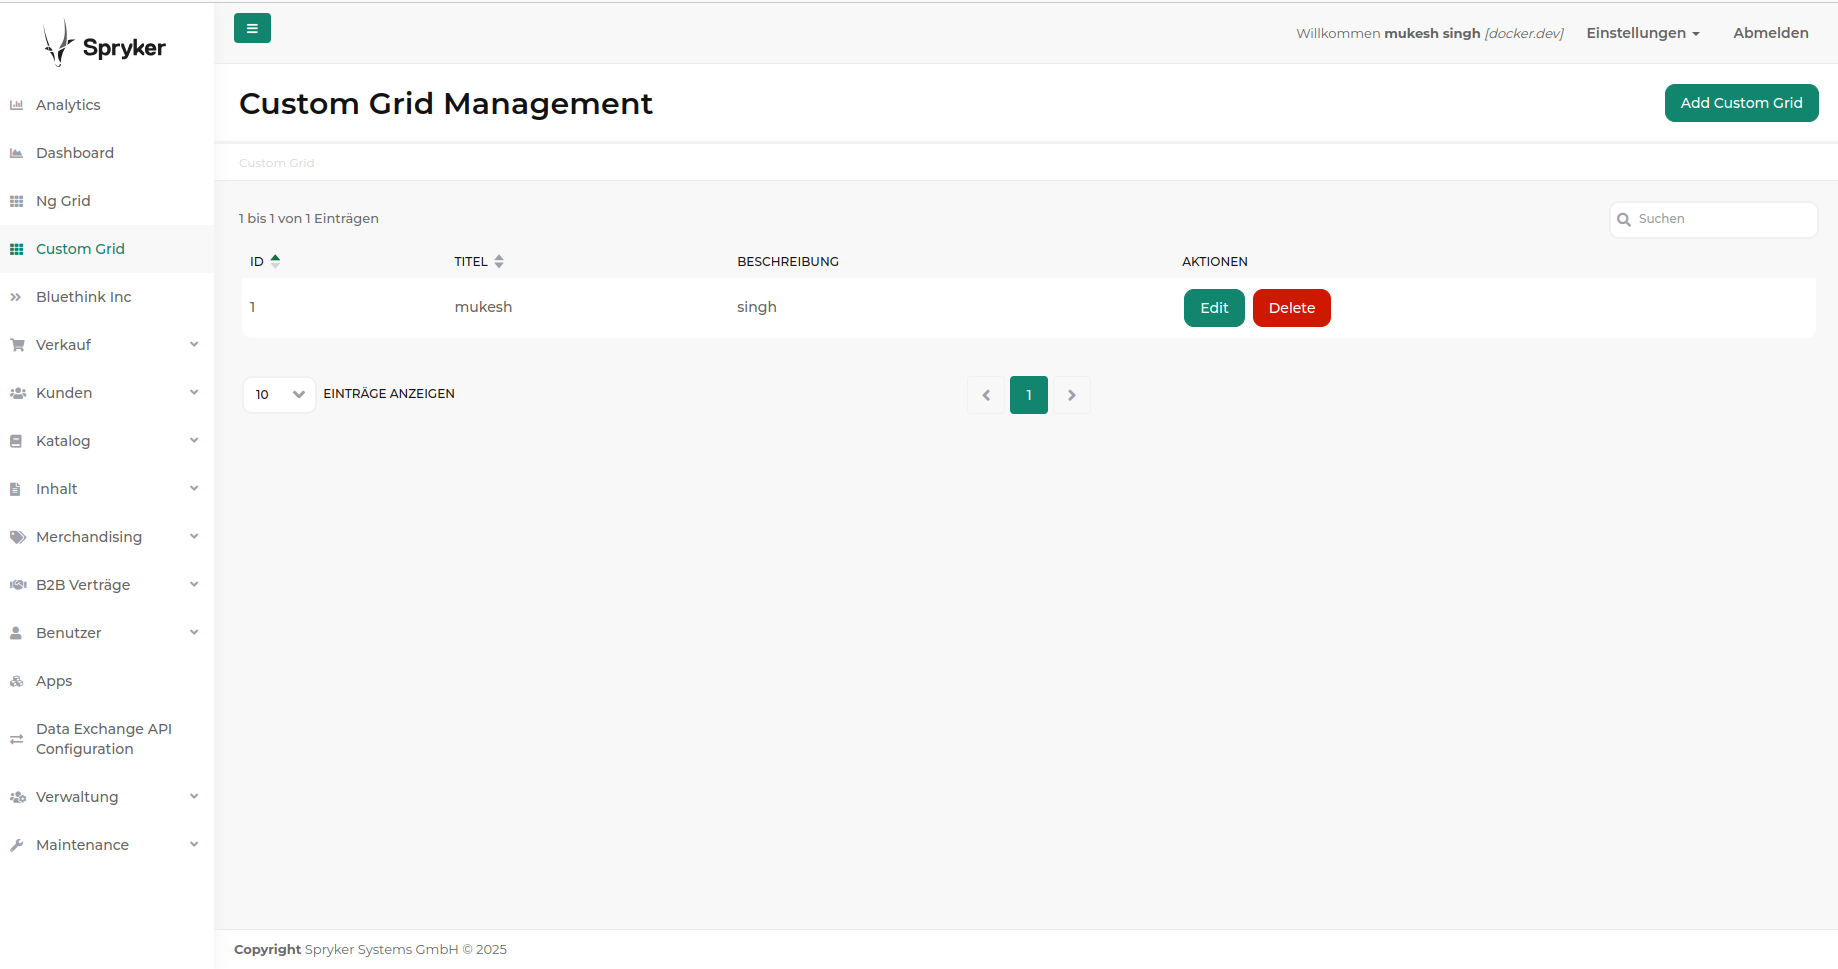
your-spryker-project/src/Pyz/Zed/CustomGrid/Presentation/Index/index.twig
|
1 2 3 4 5 6 7 8 9 10 11 12 13 14 15 16 17 18 19 20 21 22 23 24 25 26 27 28 29 30 31 32 33 |
{% extends '@Application/Layout/layout.twig' %} {% set widget_title = 'Custom Grid Management' | trans %} {% block section_title %}{{ widget_title }}{% endblock %} {% block action %} {{ createActionButton('/custom-grid/add', 'Add Custom Grid' | trans) }} {% endblock %} {% block content %} {% if table %} {{ table | raw }} {% else %} <p>No table data available.</p> {% endif %} {% endblock %} |
Step 10: Create Shared file
your-spryker-project/src/Pyz/Shared/CustomGrid/Transfer/custom_grid.transfer.xml
|
1 2 3 4 5 6 7 8 9 10 11 12 13 14 15 16 17 18 19 20 21 22 23 |
<?xml version="1.0"?> <transfers xmlns="spryker:transfer-01" xmlns:xsi="http://www.w3.org/2001/XMLSchema-instance" xsi:schemaLocation="spryker:transfer-01 http://static.spryker.com/transfer-01.xsd"> <transfer name="CustomGrid"> <property name="id" type="int" /> <property name="title" type="string" /> <property name="description" type="string" /> </transfer> </transfers> |
Step 11: Run following command
|
1 2 3 |
console propel:install console transfer:generate console c:e |

if not showing backoffice need to following this command then check backoffice
|
1 |
docker/sdk clean-data && docker/sdk up --data && docker/sdk console q:w:s -v -s |

Now Open backoffice


Mukesh Singh
2025-01-09