The Sales Order View is a page in the Magento admin panel that displays all the information related to a specific sales order. This page provides a detailed overview of the order, including customer information, order status, shipping and billing addresses, payment method, order items, prices, discounts, and taxes. Learn how to add sections to the Magento 2 sale order view page in this article. Depending on the goals of each individual, each component will have a unique custom function. A module called “Bluethinkinc_CustomSection” contains code.
1. Add a button
We’ll start by learning how to include a top button in the order view.
A plugin that targets “beforeSetLayout” is used first. As demonstrated below, add the following “type” node to your module’s “app/code/Bluethinkinc/CustomSection/etc/adminhtml/di.xml” file.
|
1 2 3 4 5 6 7 |
<?xml version="1.0"?> <config xmlns:xsi="http://www.w3.org/2001/XMLSchema-instance" xsi:noNamespaceSchemaLocation="urn:magento:framework:ObjectManager/etc/config.xsd"> <!--Add a button--> <type name="Magento\Sales\Block\Adminhtml\Order\View"> <plugin name="sales_order_adminhtml_view_custom_button_plugin" type="Bluethinkinc\CustomSection\Plugin\Sales\Block\Adminhtml\Order\View"/> </type> </config> |
Step 2: Define button attributes
To add a button and its attributes, create a button class.
Add the subsequent code to the “app/code/Bluethinkinc/CustomSection/Plugin/Sales/Block/Adminhtml/Order/Button.php
|
1 2 3 4 5 6 7 8 9 10 11 12 13 14 15 16 17 18 |
<?php namespace Bluethinkinc\CustomSection\Plugin\Sales\Block\Adminhtml\Order; use Magento\Sales\Block\Adminhtml\Order\View as OrderView; class Button { public function beforeSetLayout(OrderView $subject) { $subject->addButton( 'order_custom_button', [ 'label' => __('Custom Button'), 'class' => __('custom-button'), 'id' => 'order-view-custom-button', 'onclick' => 'setLocation(\'' . $subject->getUrl('routes/controller/action'). '\')' ] ); } } |
Here, we’ve defined a button that, when pressed by the user, sends a signal via its own ID, name, and route
Result
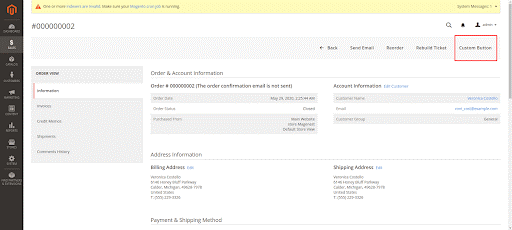
View an order from the backend and clear the layout cache. The “Custom Button” button element has been made, as you can see:

2. Add a custom tab
To add a custom tab on the Sales Order View page in Magento 2, you can follow these steps:
The sales order view.xml file will be first created with the following content and placed in the app/code/Bluethinkinc/view/adminhtml/layout directory.
|
1 2 3 4 5 6 7 8 9 10 11 12 |
<page xmlns:xsi="http://www.w3.org/2001/XMLSchema-instance" layout="admin-2columns-left" xsi:noNamespaceSchemaLocation="urn:magento:framework:View/Layout/etc/page_configuration.xsd"> <body> <referenceContainer name="left"> <referenceBlock name="sales_order_tabs"> <action method="addTab"> <argument name="name" xsi:type="string">custom_tab</argument> <argument name="block" xsi:type="string">Bluethinkinc\CustomSection\Block\Adminhtml\Order\View\Tab\CustomTab</argument> </action> </referenceBlock> </referenceContainer> </body> </page> |
We created a new tab on the left-hand menu in this file, complete with a name and the block class that is in charge of it.
Step 2: Define block class
We’ll build a class called CustomTab inside app/code/Bluethinkinc/CustomSection/Block/Admin/Order/View/Tab:
|
1 2 3 4 5 6 7 8 9 10 11 12 13 14 15 16 17 18 19 20 21 22 23 24 25 26 27 28 29 30 31 32 33 34 35 36 37 38 39 40 41 42 43 44 45 46 47 48 49 50 51 52 53 54 55 56 57 58 59 60 61 62 63 64 65 66 67 68 69 70 71 72 73 74 75 76 77 |
<?php namespace Bluethinkinc\CustomSection\Block\Adminhtml\Order\View\Tab; class CustomTab extends \Magento\Backend\Block\Template implements \Magento\Backend\Block\Widget\Tab\TabInterface { protected $_template = 'order/view/tab/customtab.phtml'; /** * @var \Magento\Framework\Registry */ private $_coreRegistry; /** * View constructor. * @param \Magento\Backend\Block\Template\Context $context * @param \Magento\Framework\Registry $registry * @param array $data */ public function __construct( \Magento\Backend\Block\Template\Context $context, array $data = [] ) { parent::__construct($context, $data); } /** * Retrieve order model instance * * @return int *Get current id order */ public function getOrderId() { return $this->getOrder()->getEntityId(); } /** * Retrieve order increment id * * @return string */ public function getOrderIncrementId() { return $this->getOrder()->getIncrementId(); } /** * {@inheritdoc} */ public function getTabLabel() { return __('My Custom Tab'); } /** * {@inheritdoc} */ public function getTabTitle() { return __('My Custom Tab'); } /** * {@inheritdoc} */ public function canShowTab() { return true; } /** * {@inheritdoc} */ public function isHidden() { return false; } } |
In order to add information to the custom tab, we will finally create the template file.
|
1 2 3 4 5 6 7 8 9 10 11 12 13 14 15 16 17 18 19 20 21 22 23 24 25 26 27 28 29 |
<?php /** * @var $block \Bluethinkinc\CustomSession\Block\Adminhtml\Order\View\Tab\CustomTab */ ?> <div class="fieldset-wrapper order-information"> <div> <h2>Bluethinkinc</h2> </div> <div class="fieldset-wrapper-title"> <span class="title"><?php /* @escapeNotVerified */ echo __('Information for new Order tab') ?></span> </div> <table class="admin__table-secondary"> <tbody> <?php echo $block->getChildHtml(); ?> <tr> <th><?php /* @escapeNotVerified */ echo __('Order ID:') ?></th> <td><?php echo $block->getOrderIncrementId(); ?></td> </tr> <tr> <th><?php /* @escapeNotVerified */ echo __('Last History:') ?></th> <td><?php echo __('History of order') ?></td> </tr> </tbody> </table> |
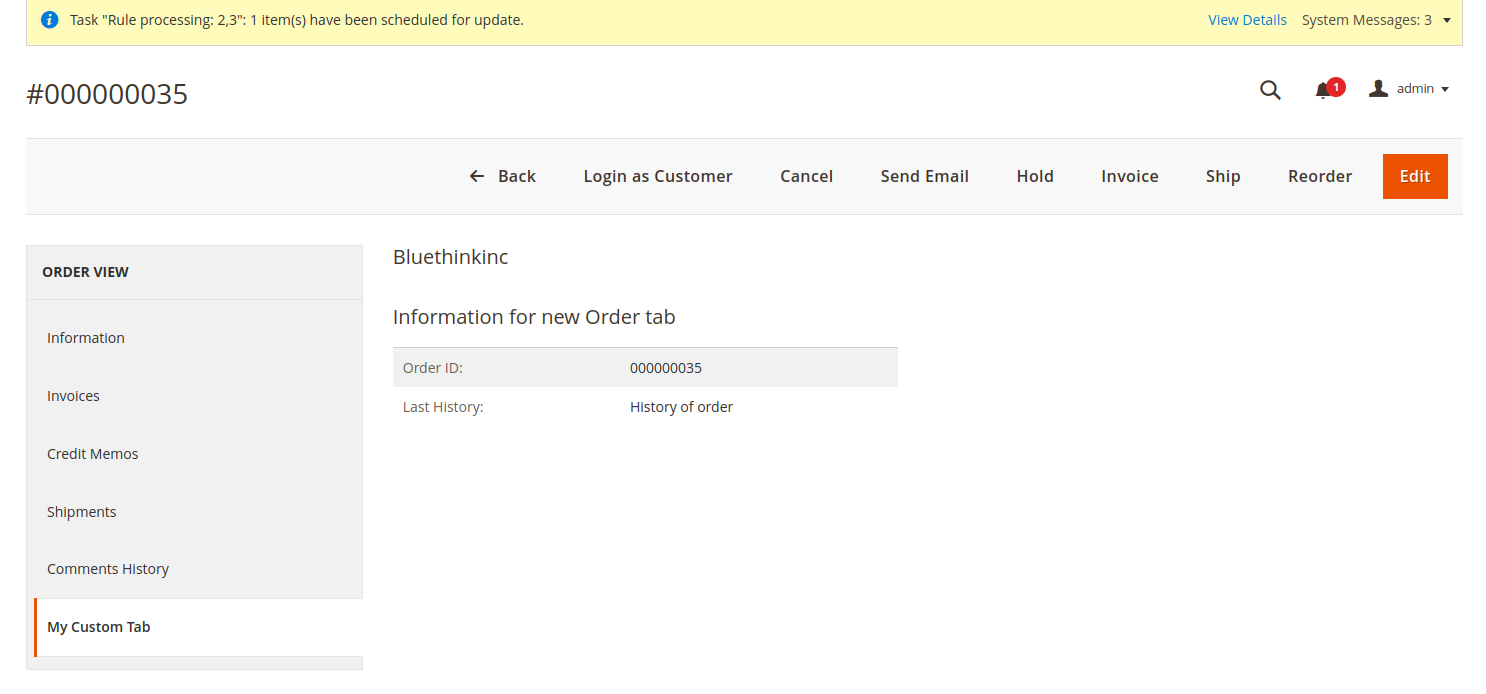
The left panel now includes our new tab, as shown below:

3. Add a custom block to order view information
Step 1 : Define a custom block in the layout XML in step 1.
The sales order view.xml file in the app/code/Bluethinkinc/CustomSection/view/adminhtml/layout directory must first have the following code included.
|
1 2 3 4 5 6 7 8 9 10 |
<?xml version="1.0"?> <page xmlns:xsi="http://www.w3.org/2001/XMLSchema-instance" layout="admin-2columns-left" xsi:noNamespaceSchemaLocation="urn:magento:framework:View/Layout/etc/page_configuration.xsd"> <body> <!--add custom block --> <referenceBlock name="order_additional_info"> <block class="Bluethinkinc\CustomSection\Block\Adminhtml\Order\View\View" name="sales_custom_view" template="order/view/view.phtml" /> </referenceBlock> </body> </page> |
The order block for the Additional Information will contain our custom block.
Step 2: Define block class
The View.php file will then be created and placed in the location app/code/Bluethinkinc/CustomSection/Block/Adminhtml/Order/View.
|
1 2 3 4 5 6 7 8 9 10 |
<?php namespace Bluethinkinc\CustomSection\Block\Adminhtml\Order\View; class View extends \Magento\Backend\Block\Template { public function myFunction() { //your code in here return "Bluethinkinc"; } } |
Step 3: Define view template
The block’s content is then created in the view.phtml file, which is the last step.
|
1 2 3 4 5 6 7 8 9 10 11 12 |
<?php /** * @var $block \Bluethinkinc\CustomSection\Block\Adminhtml\Order\View\View */ ?> <div> <h2><?php echo $block->myFunction()?></h2> <h3>Add custom block to order view information</h3> </div> |
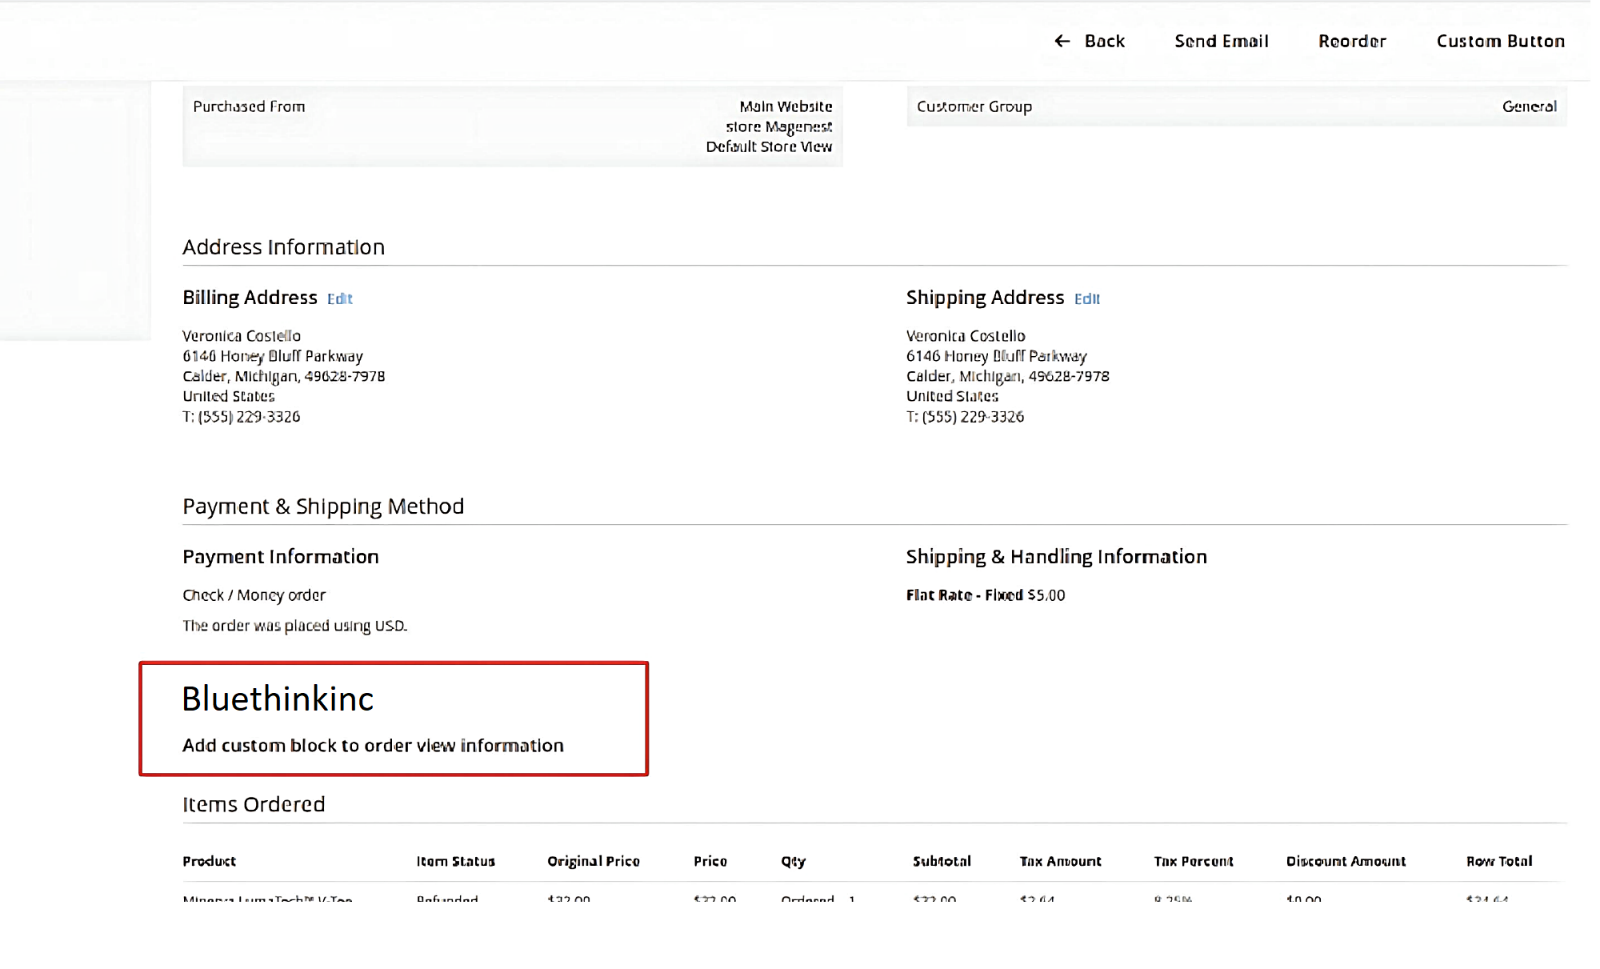
When you click to view any order after clearing the cache, you will see that 1 block has been inserted as the red cavity below.

We trust you may find this article to be useful.
Thanks for reading!


bluethinkinc_blog
2023-03-29