Google Ads Conversion Tracking Through Magento Platform:
If you want to track the success of your Google Ads campaigns on your Magento platform, setting up conversion tracking is crucial. Follow these steps to integrate Google Ads conversion tracking seamlessly:
1. Login to your Google Ads account: Visit https://ads.google.com/intl/en_IN/home/ and log in to your Google Ads account.
2. Navigate to Tools and Settings: Once logged in, go to “Tools and Settings” in the top right corner.
3. Access Conversions: In the “Tools and Settings” menu, find and select “Conversions.”
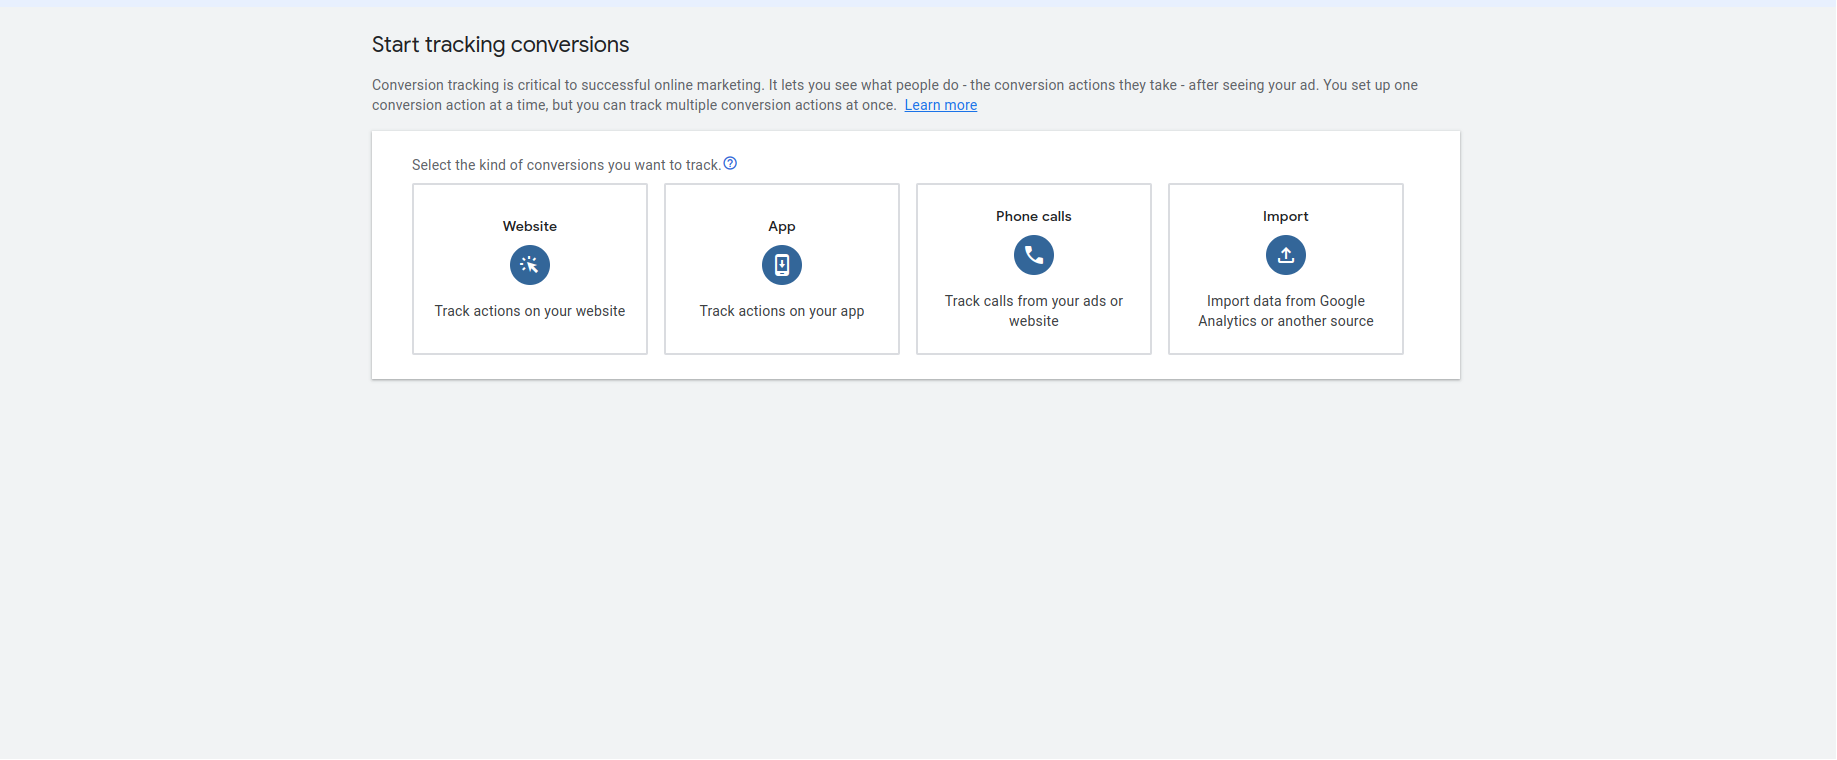
4. Create a New Conversion Action: Click on “New Conversion Action” to set up a new conversion tracking action. You will be directed to an interface like the one below

5. Choose Website Option: Select the “Website” option and provide your website URL. Configure the conversion name, date, and other relevant details.
Showing interface like this:

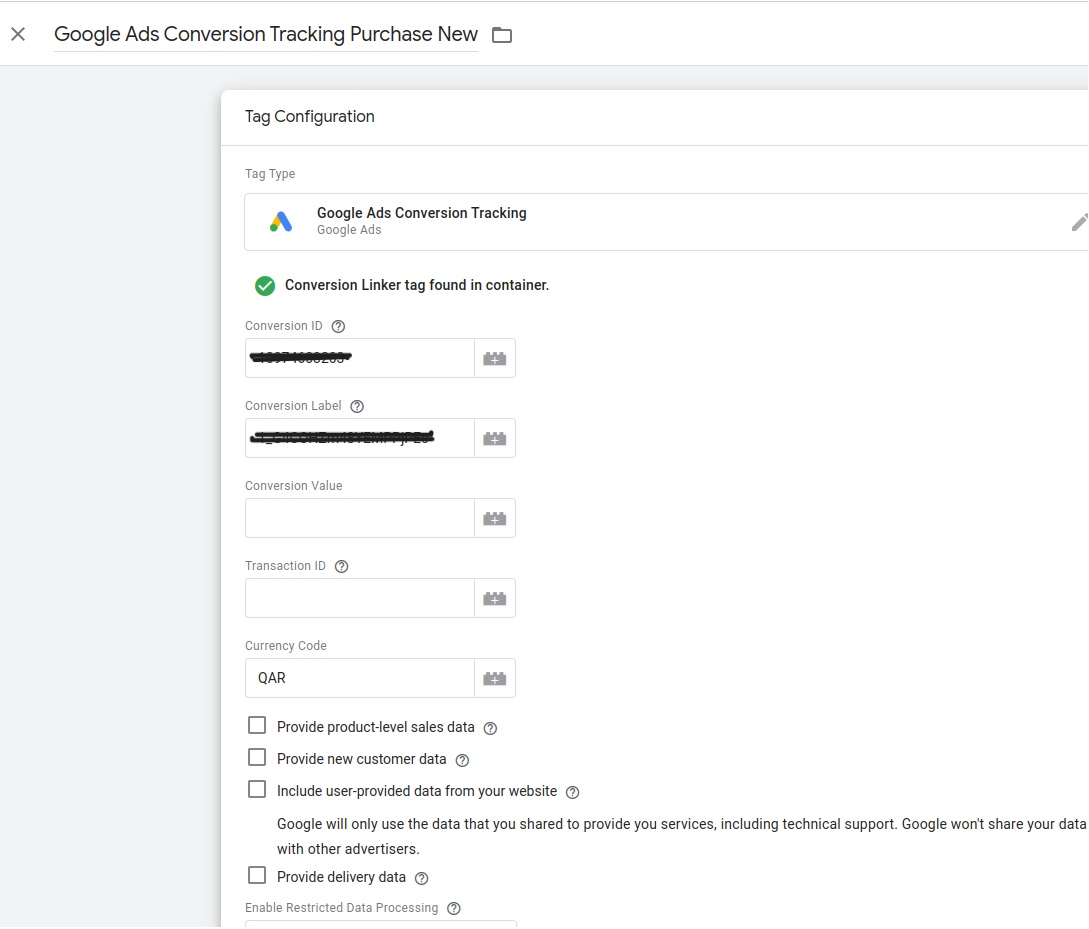
6. Tag Setup: In the “Tag Setup” section, you will find the conversion ID and conversion label. Copy both of these as you will need them for the next steps.
7. Configure Google Tag Manager https://tagmanager.google.com/:
Open Google Tag Manager and create a new tag. Fill in the details, including the trigger name, conversion ID, and conversion label copied in the previous step.

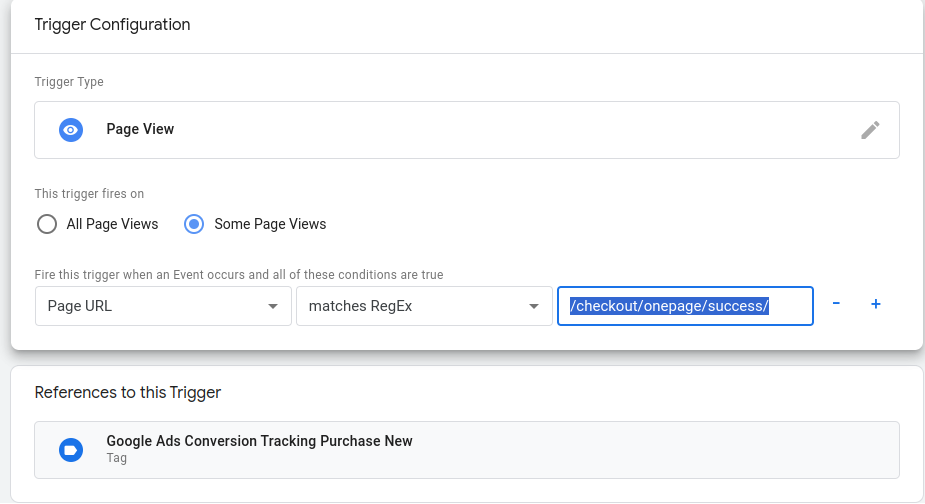
8. Create Trigger for Checkout Page: To track sales and purchase rates on your e-commerce site, create a trigger for the checkout success page. The URL for the order success page typically looks like this: /checkout/onepage/success/.

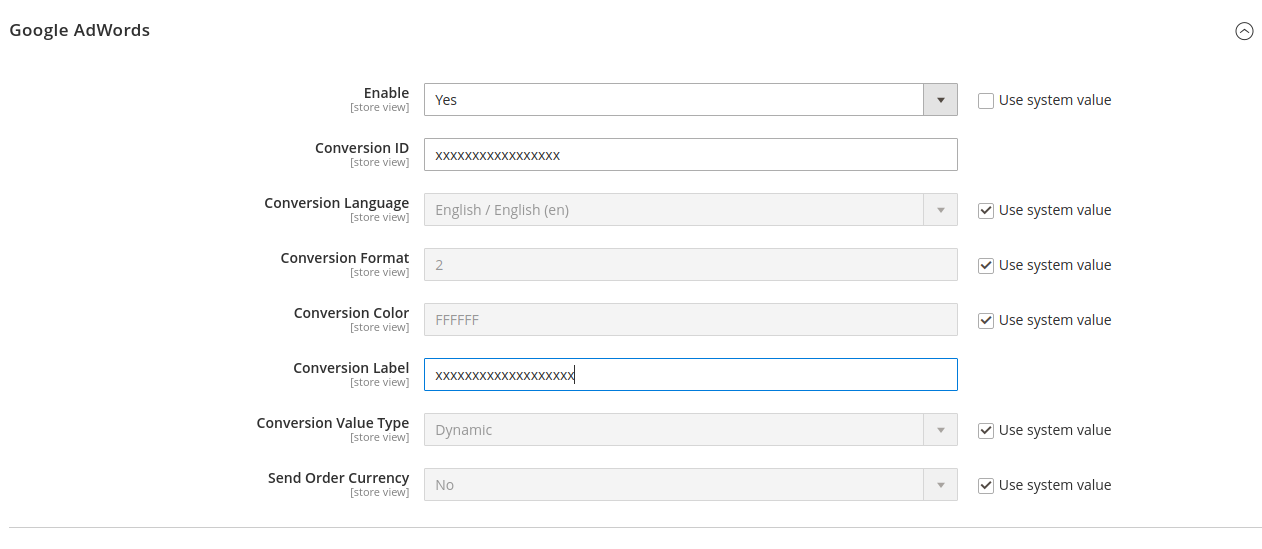
9. Magento Configuration: In the Magento admin panel, go to “Store -> Configuration -> Sales -> Google API.” Configure the conversion ID and conversion label obtained earlier.

10. Wait for Data: After completing these steps, allow for at least 24 hours. You will then be able to view your conversion rate data on your AdSense account.By following these steps, you ensure accurate tracking of your Google Ads conversions through your Magento platform


Ashutosh Kushwaha
2024-03-18