

- Signup on azure portal and make sure to turn of E-mandate.https://portal.azure.com
- Creating an azure function in visual studio:
- Download visual studio 2019 or 2022
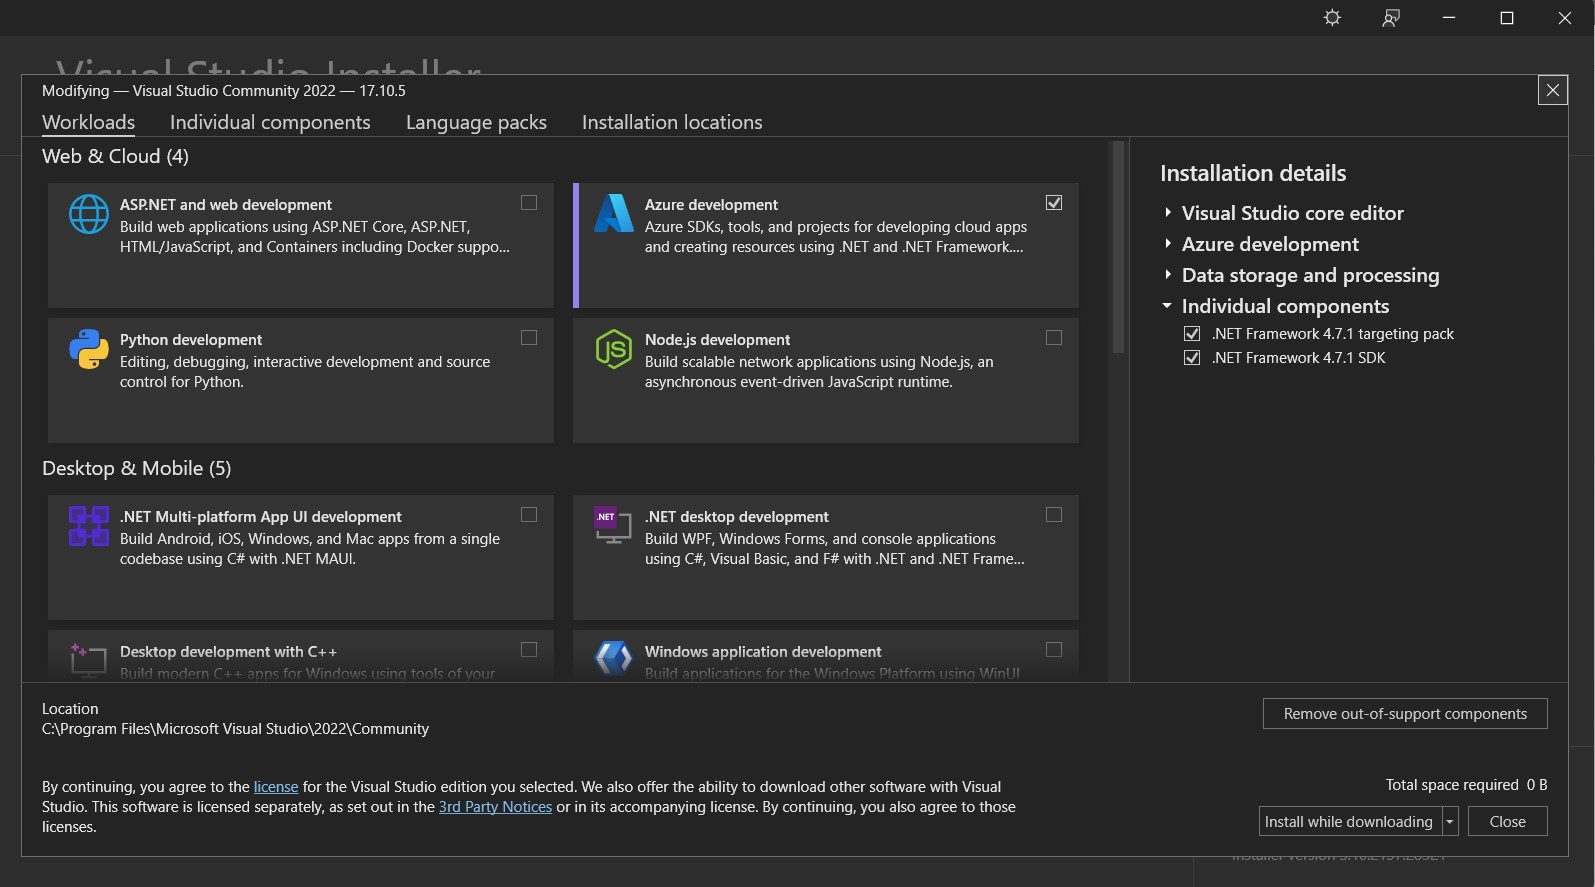
- After downloading visual studio install the azure development workload.
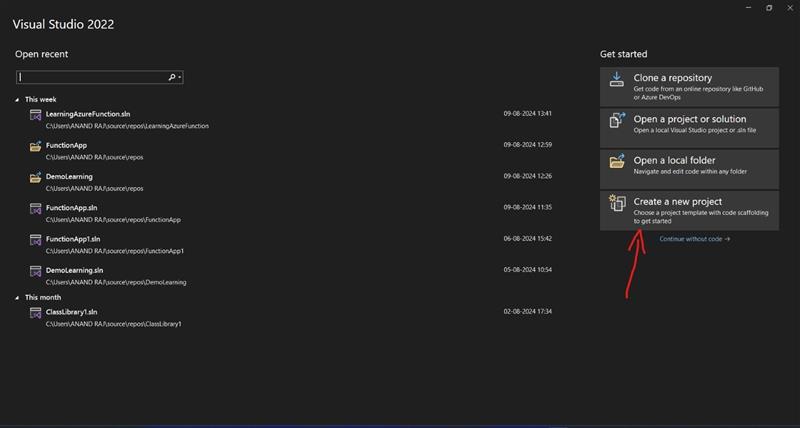
- Once azure development workload is installed open create a new project in visual studio.
- Now in search for template , search for azure function and select the azure function templates and click on next.
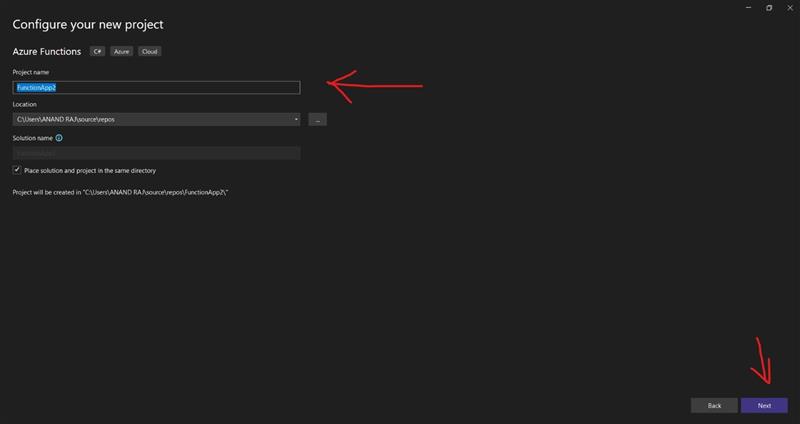
- Now name your function and click on next.
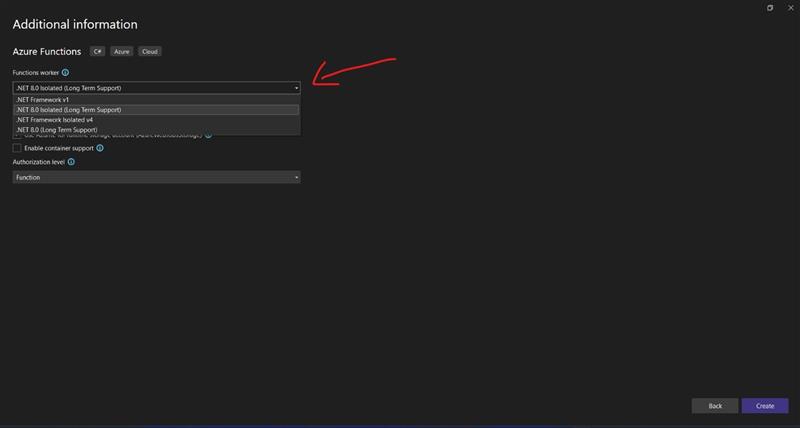
- Now From the dropdown select .Net 8.0 isolated(Long term support) or Azure v2.net core.
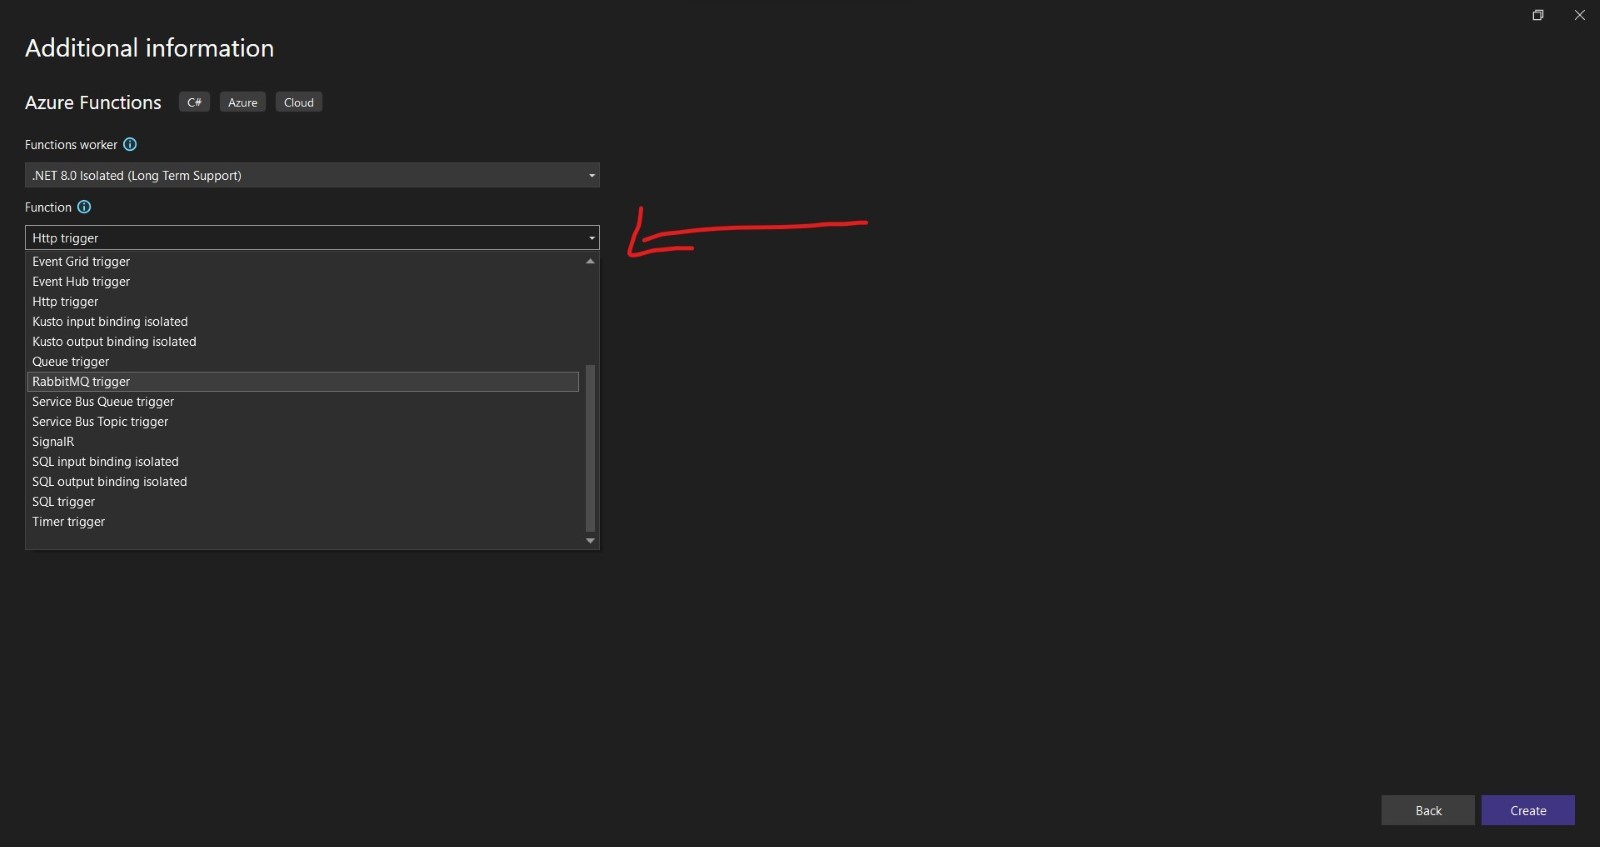
- Now Select the http triggers from the dropdown, if you want to know more about
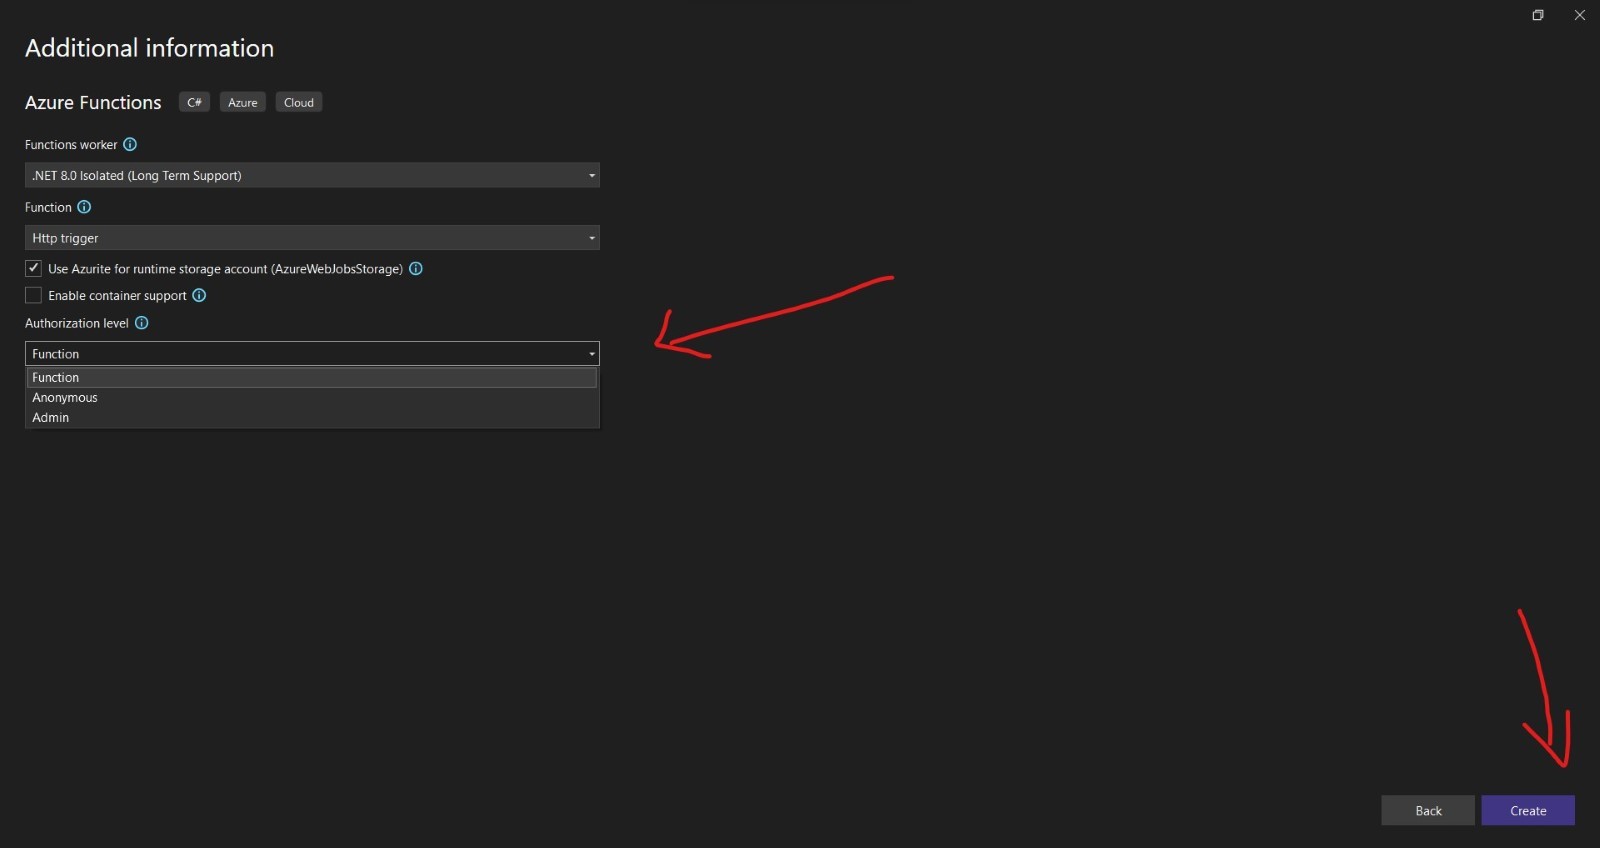
the triggers Click this. - Now select the authorization level as function from the dropdown and then create, if you want to know more about authorization Click this.
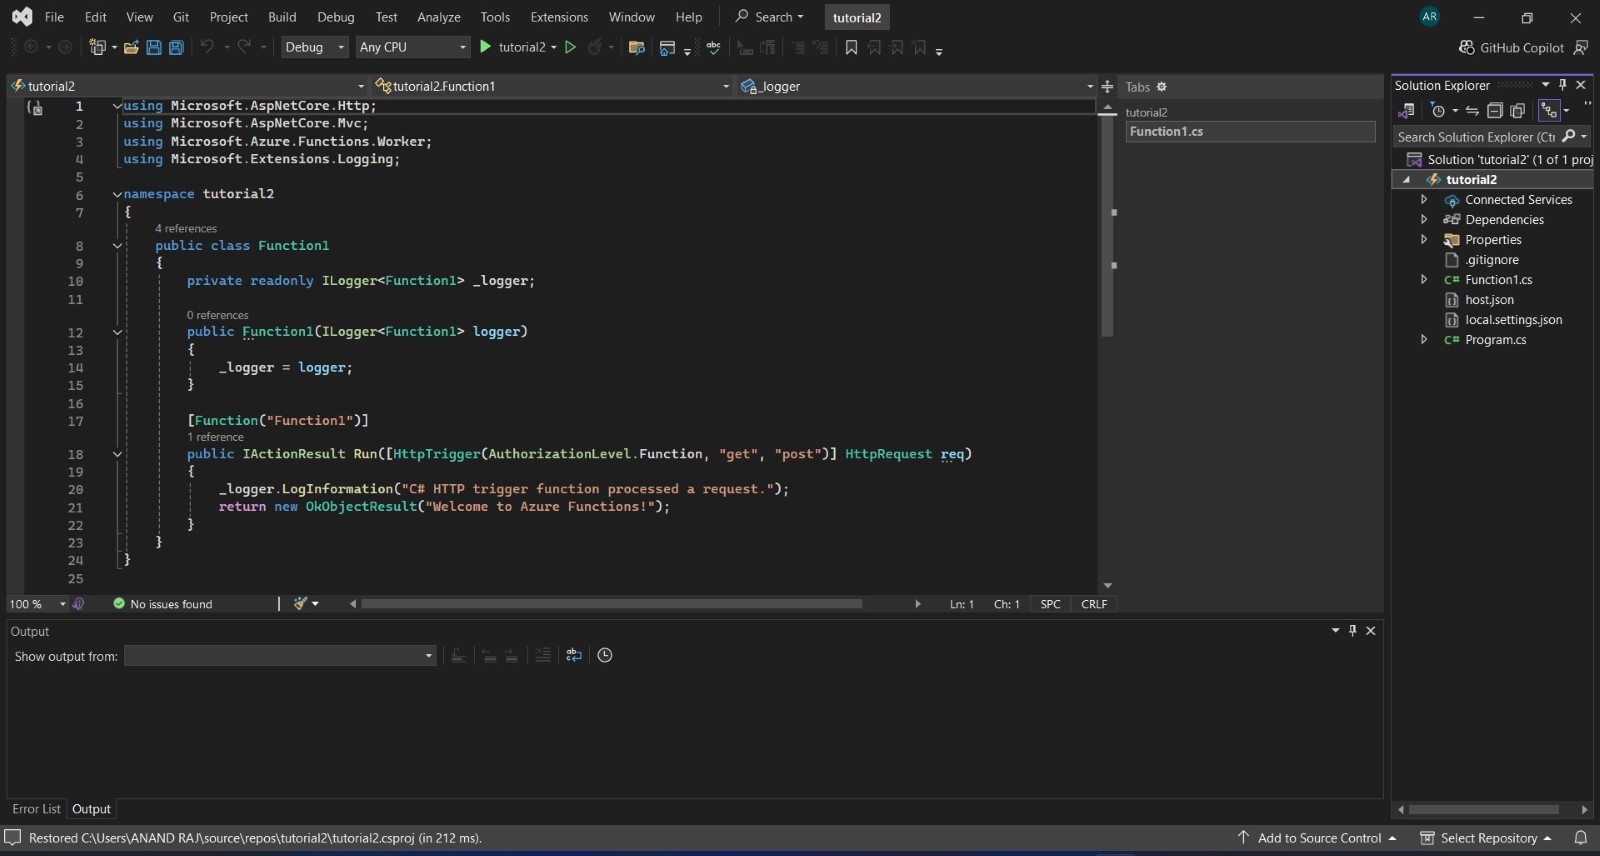
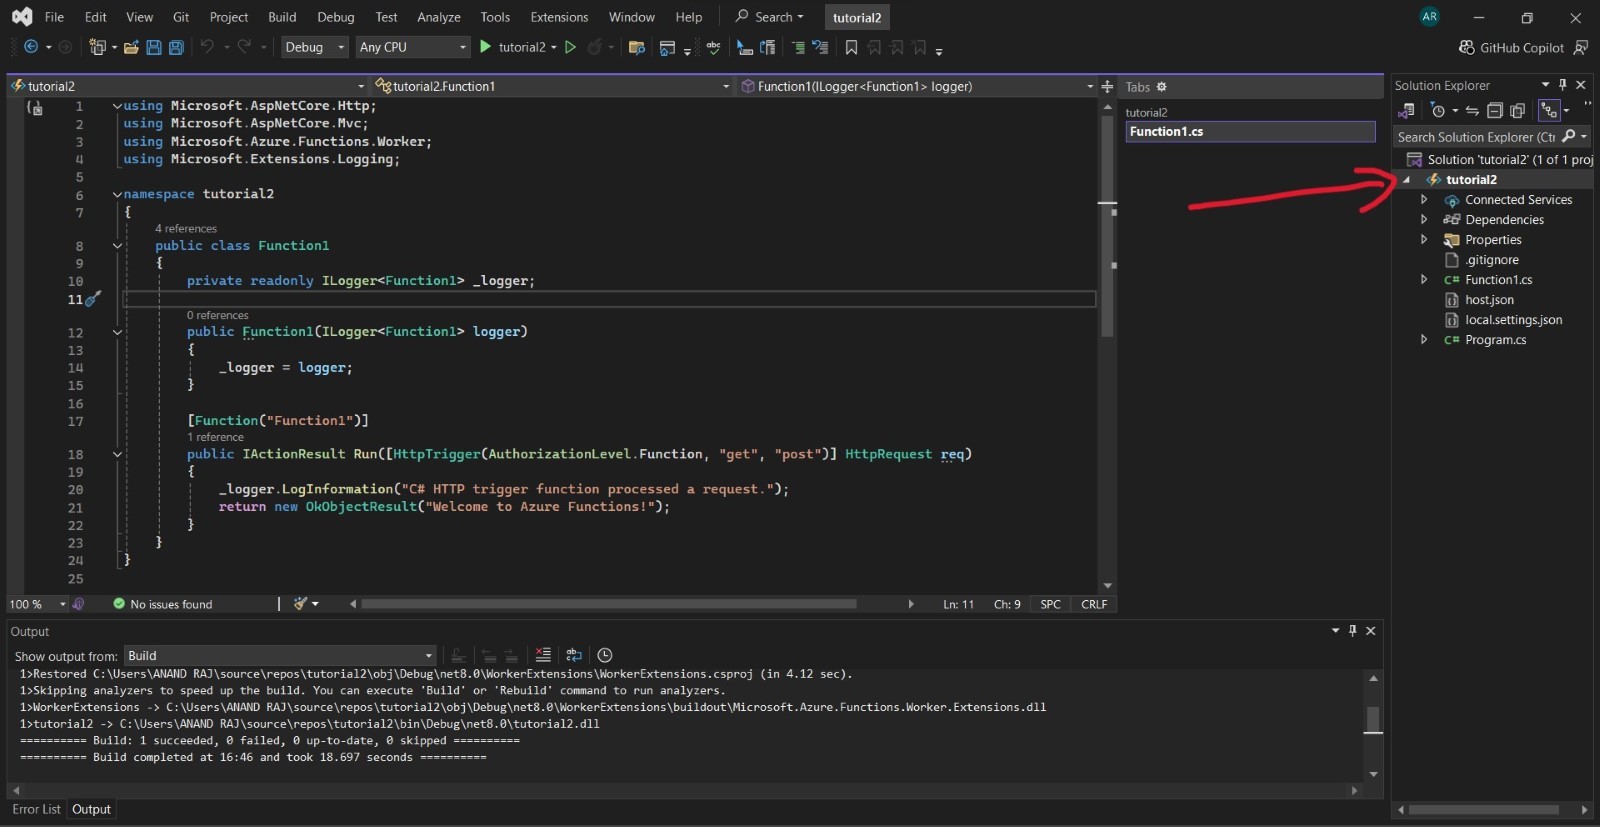
- Now after creating the project wait for few seconds for the creation of the project(Note: The errors will be removed automatically once the project is ready,wait for few seconds.)

Publishing our Azure function to Azure Portal
- Before publishing the function to the portal check if it is running perfectly on localhost
- Once the project is created successfully press ctrl+f5 to run the project locally.
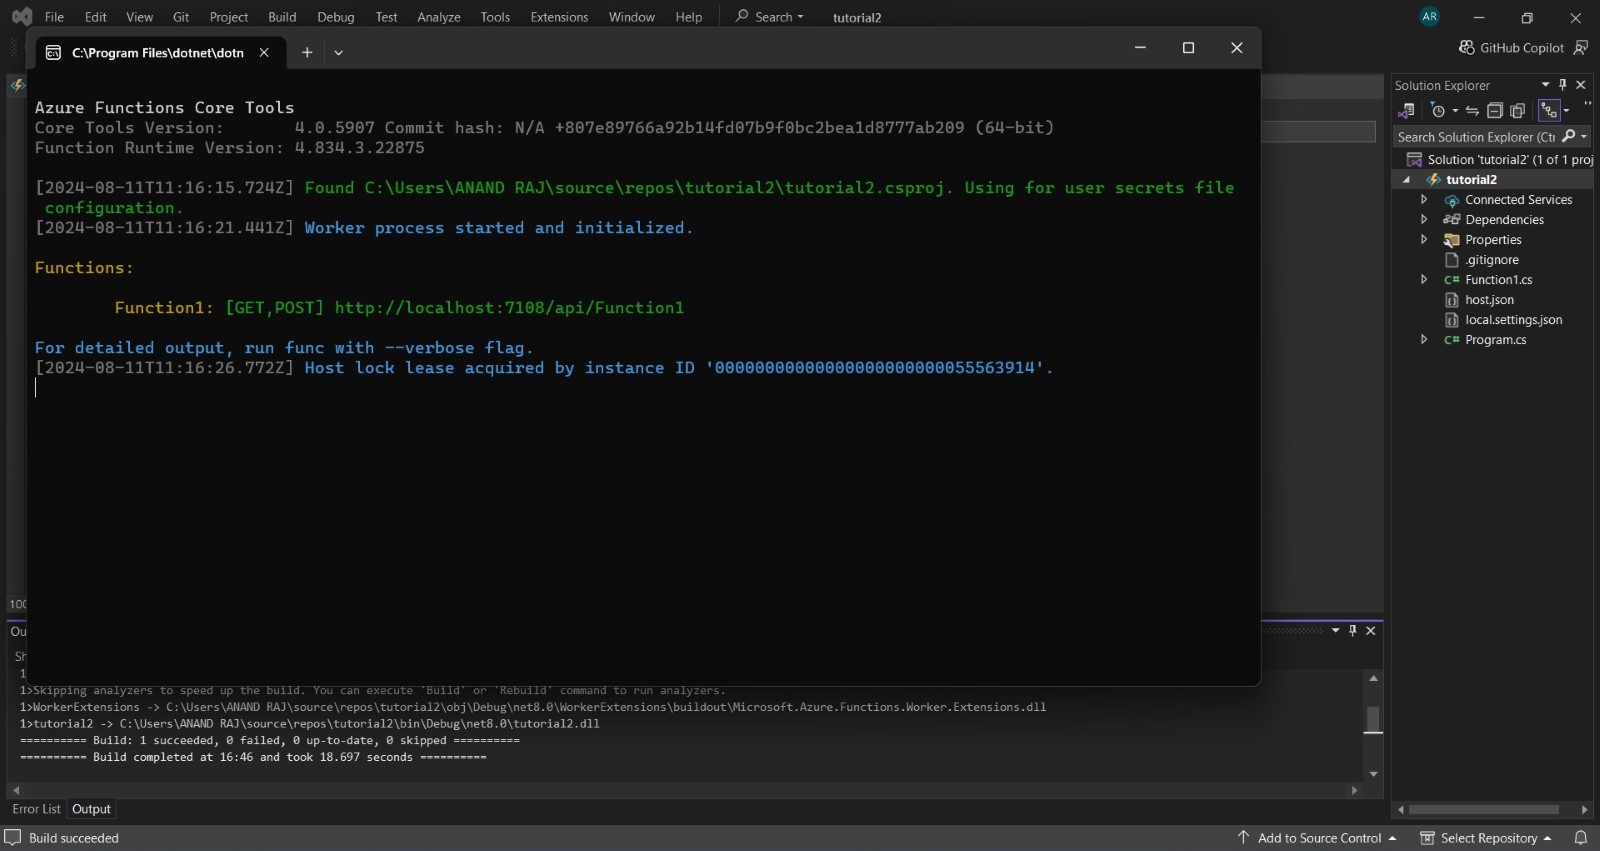
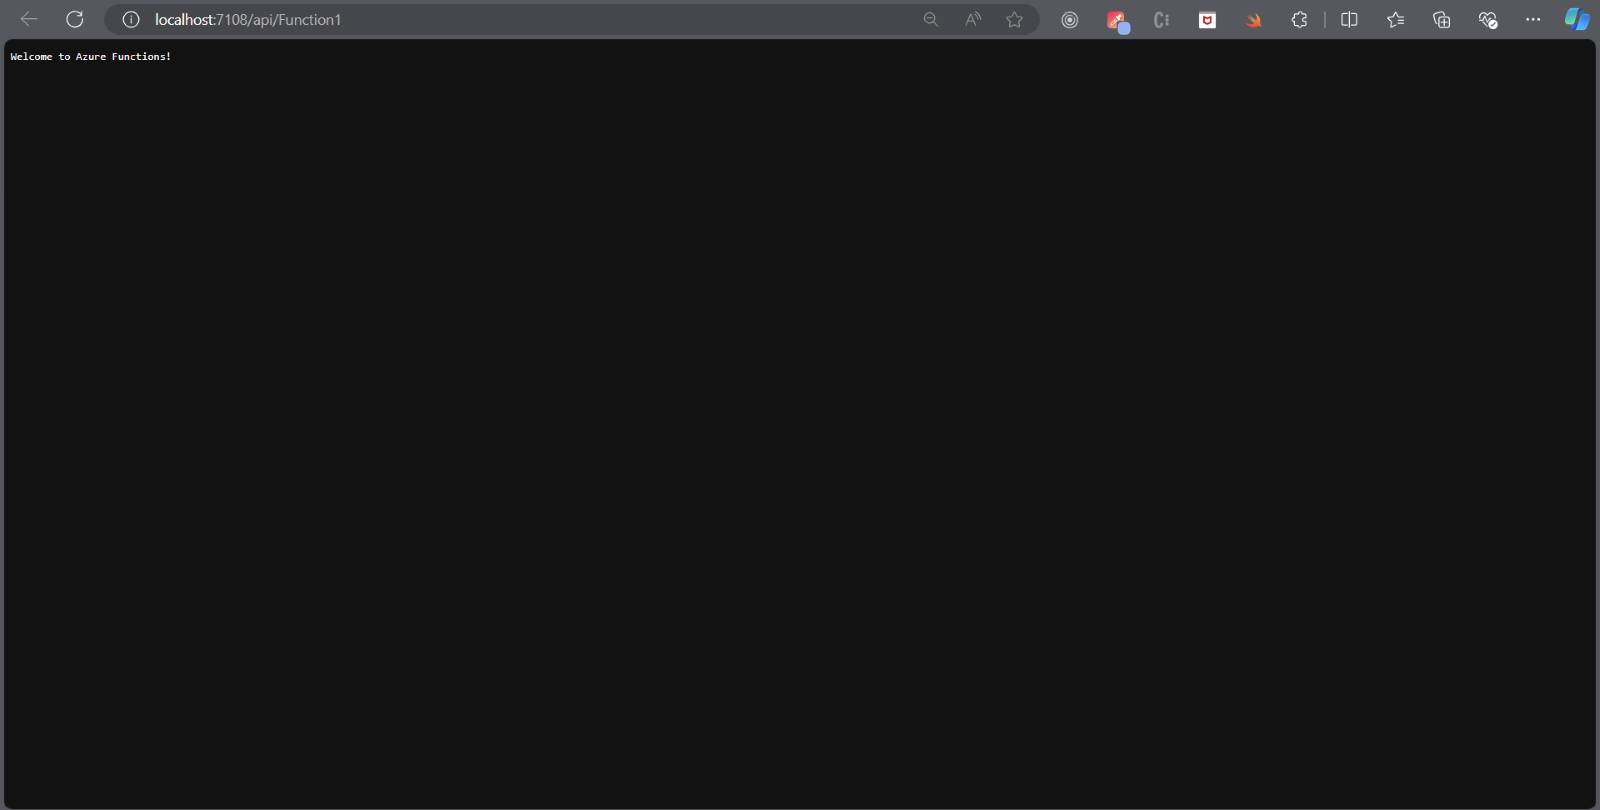
- After running the project a command terminal will open like this giving you the localhost url of the azure function.
- Copy paste the url to check if it is running properly or not.
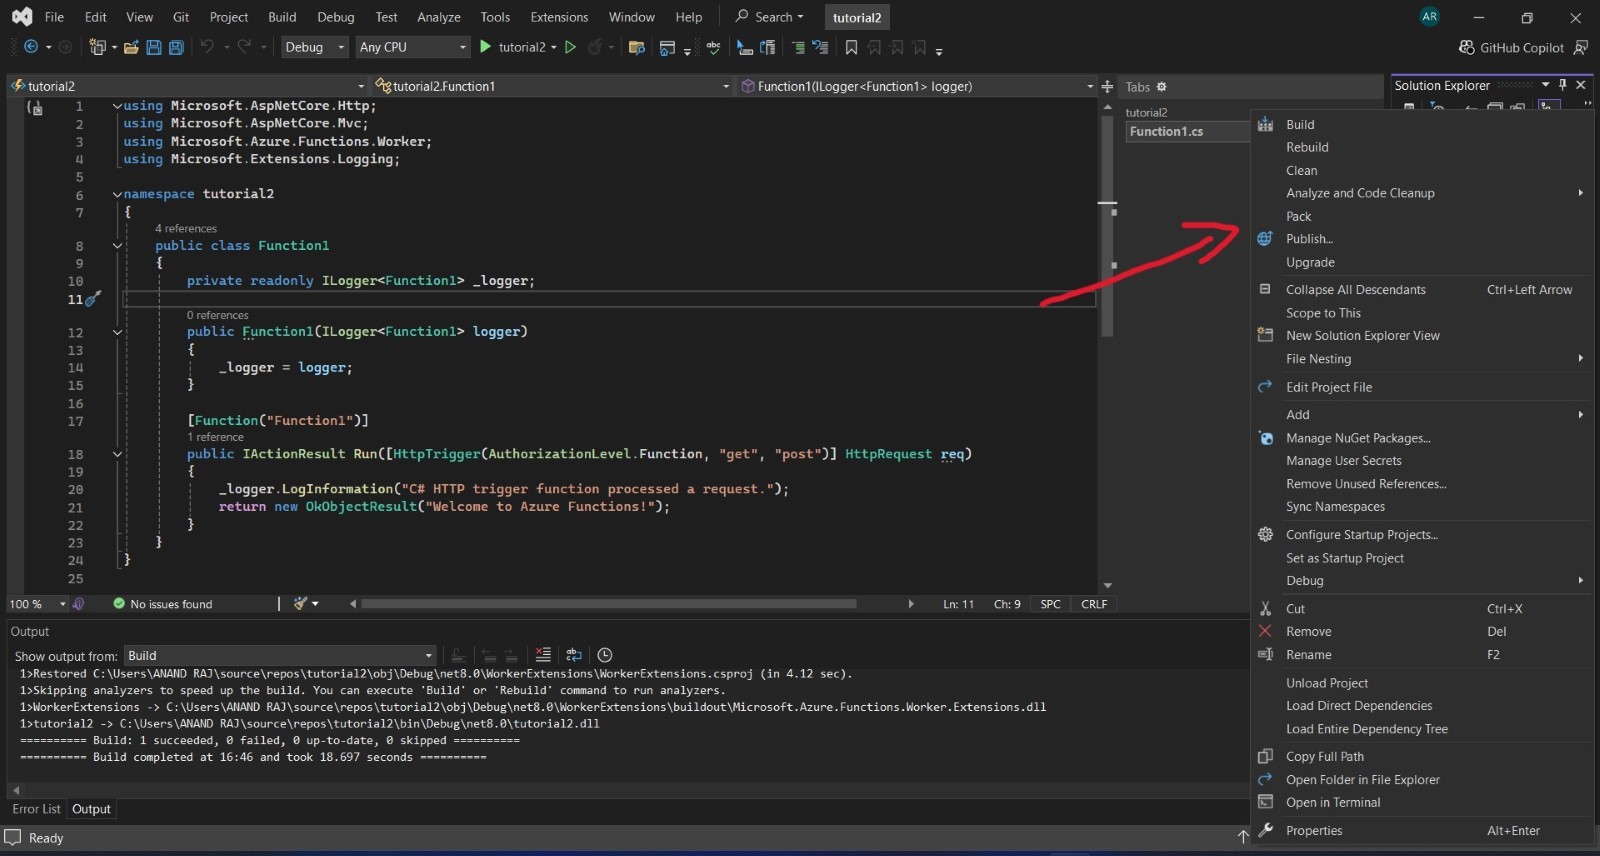
- After this publish the azure function to the portal by right clicking on the function App.
- After that click on publish.
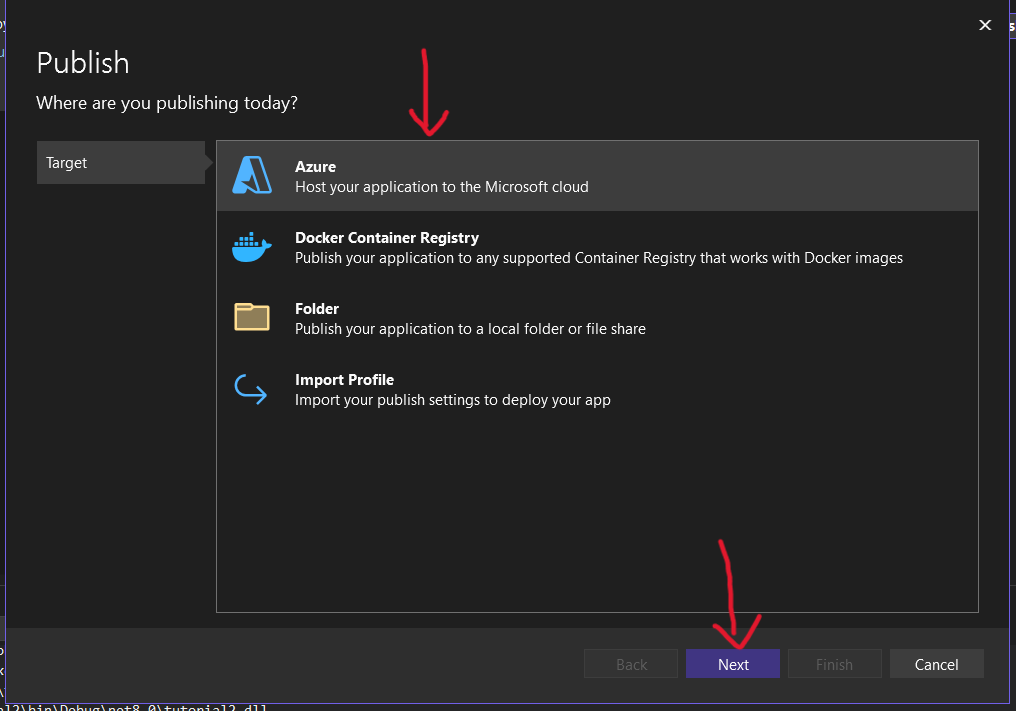
- Then select publish to Azure and click next.
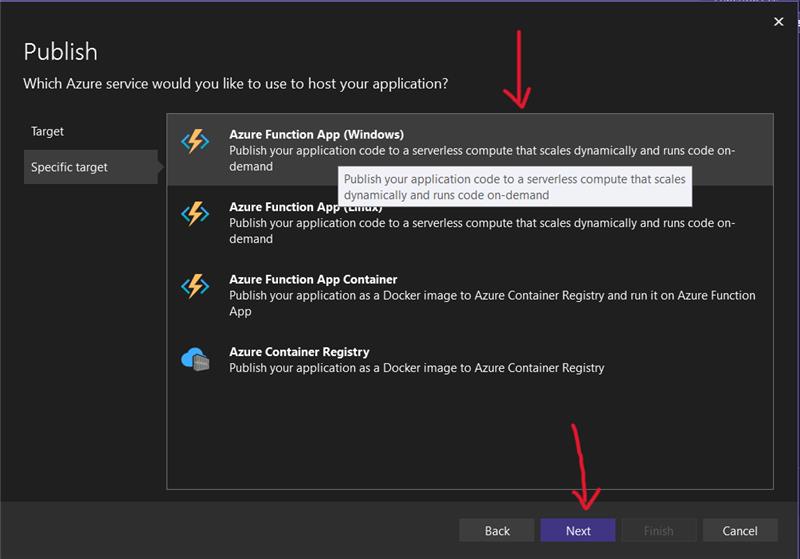
- After that select azure function for windows and click next.(NOTE: You will need to signup to your azure account if you have not done after this step).
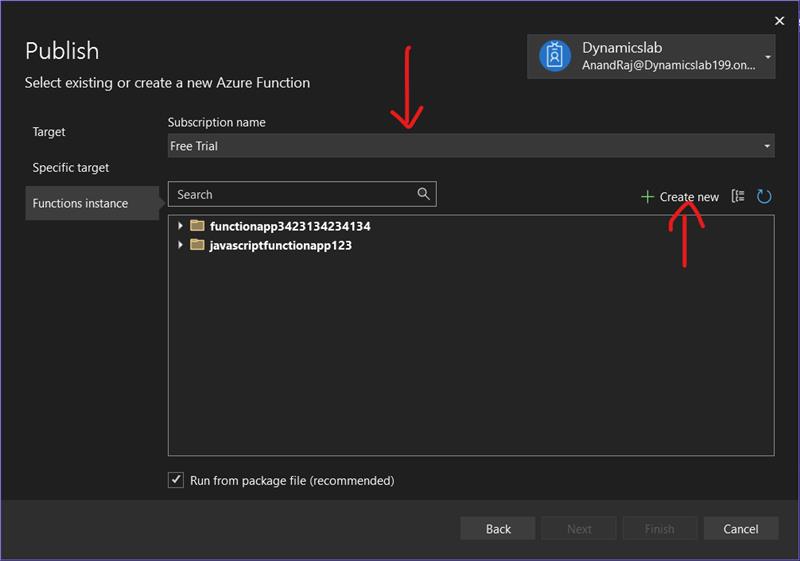
- After this if you have your pre made function instance select that or create a new one by clicking on create new.
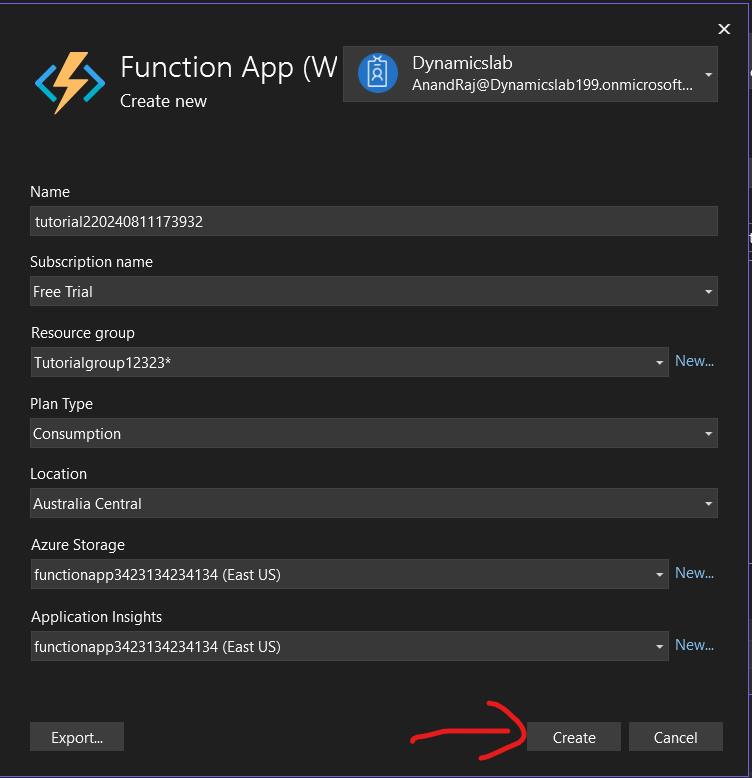
- Now a popup will open to create new function instance select the options as mentioned down and select create.
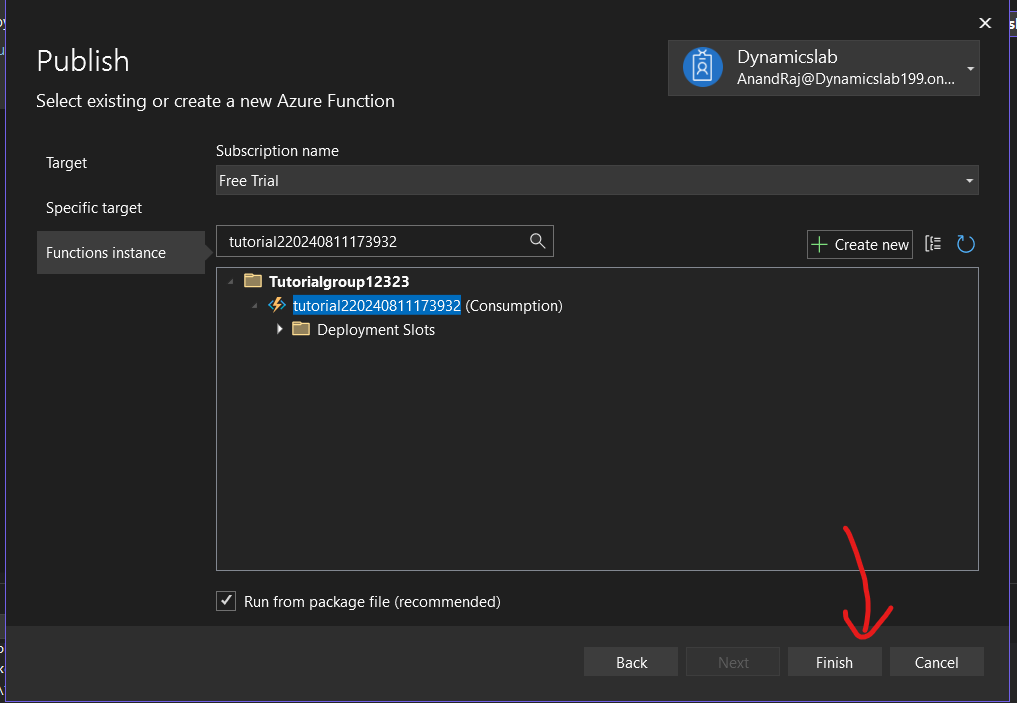
- After this click on finish
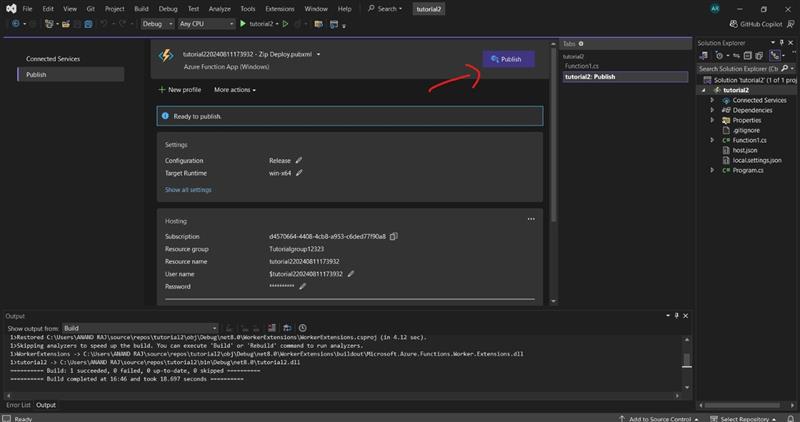
- After this publish the function App it will take some time to get published.
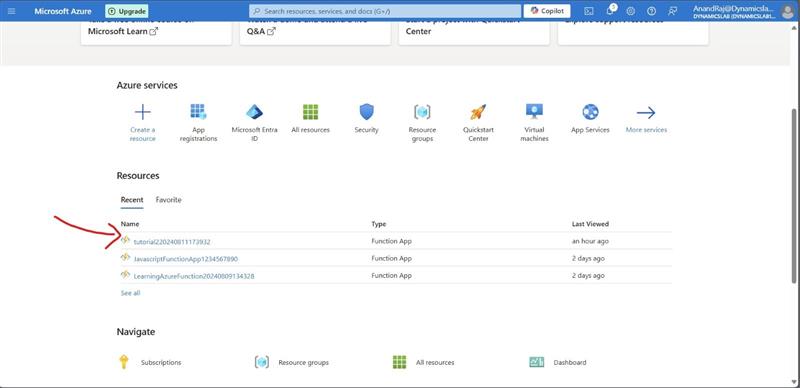
- Now go to azure portal and check if it is published or not in resources section Click this.

Getting Client ID,secret Id and Tenant ID to connect dynamics 365 and azure function.
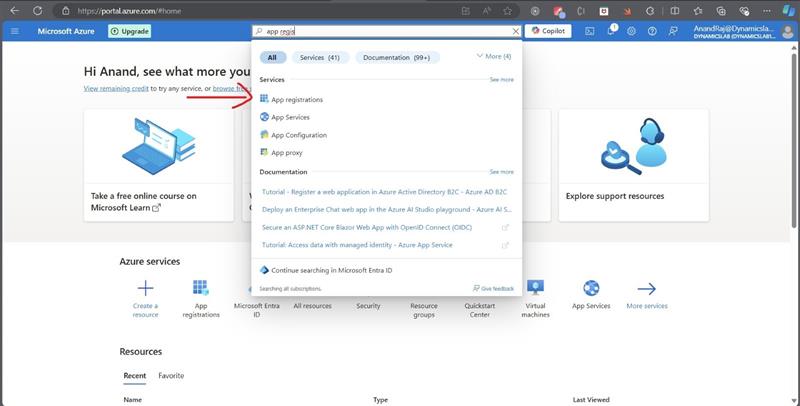
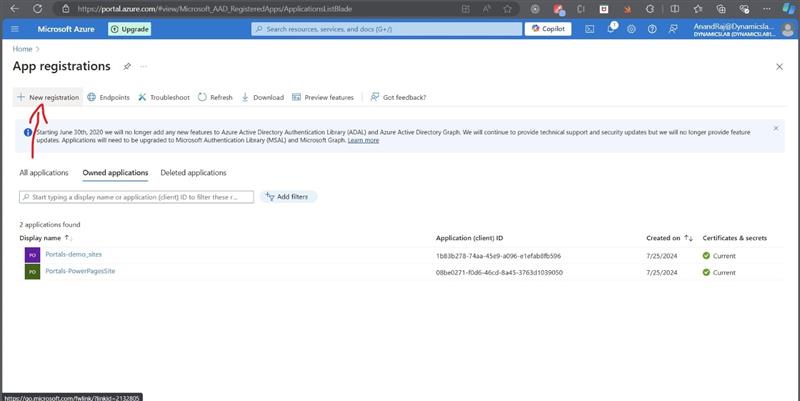
- Goto Azure portal and search for app registration and then go to app registration page and click on new registration.
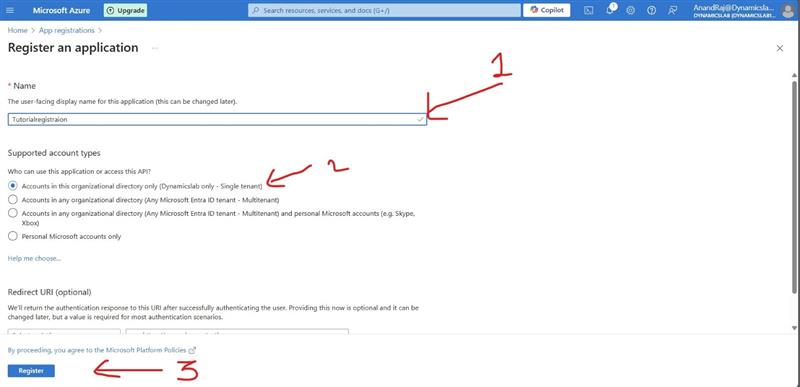
- Now name your app and click on register.
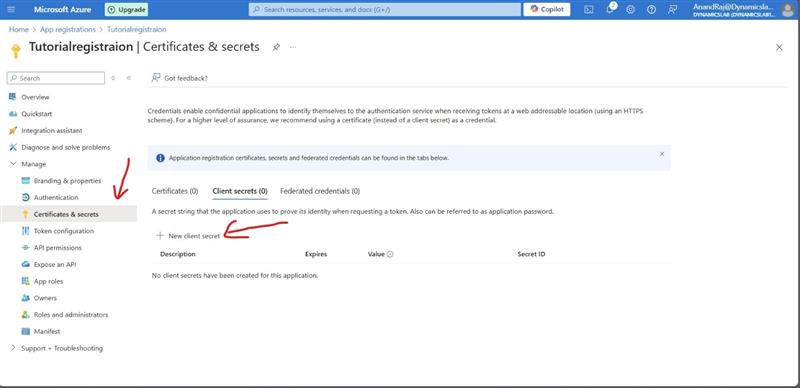
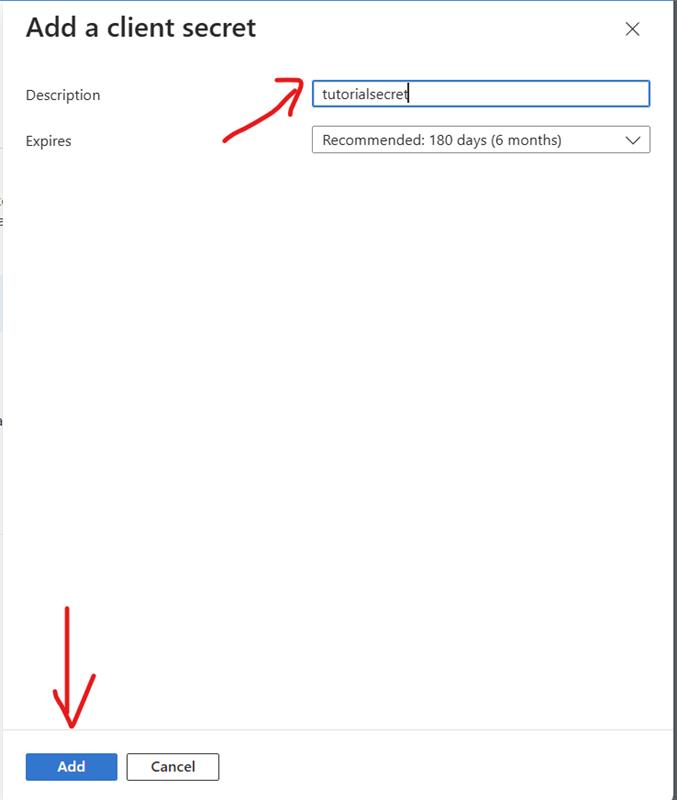
- After this click on certificates and secrets and then add new client secret.
- Follow these steps.
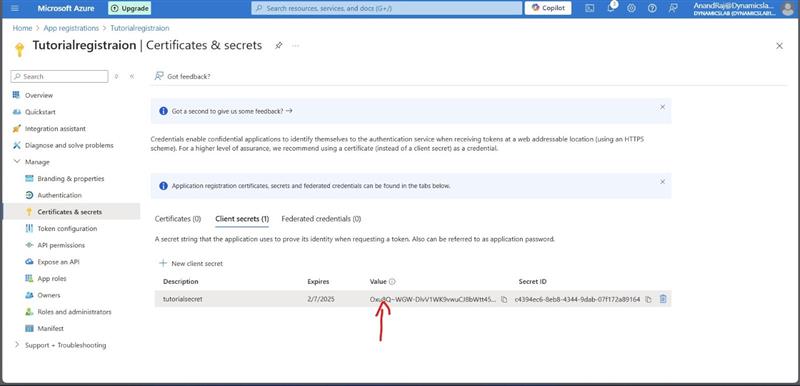
- Copy the value somewhere this is the client secret id that we will need.(Note: it is visible only for the first time copy it and store it for future use).
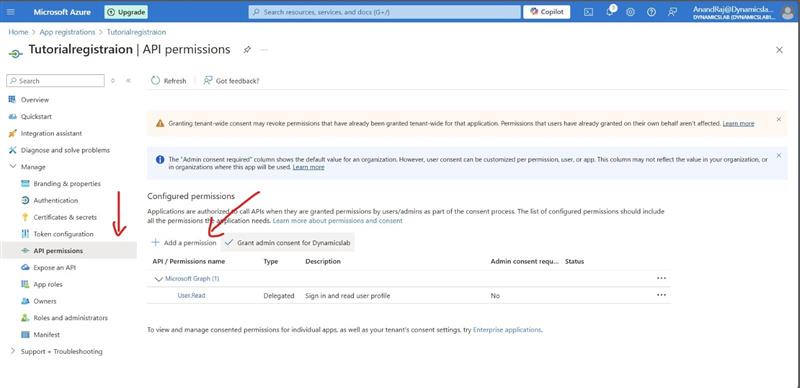
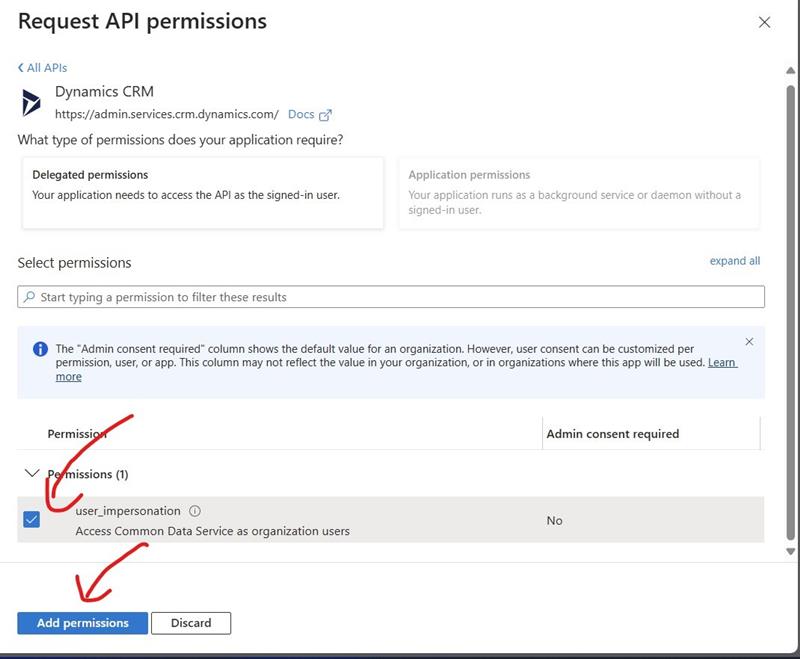
- Now goto api permission and add a permission for dynamic crm.
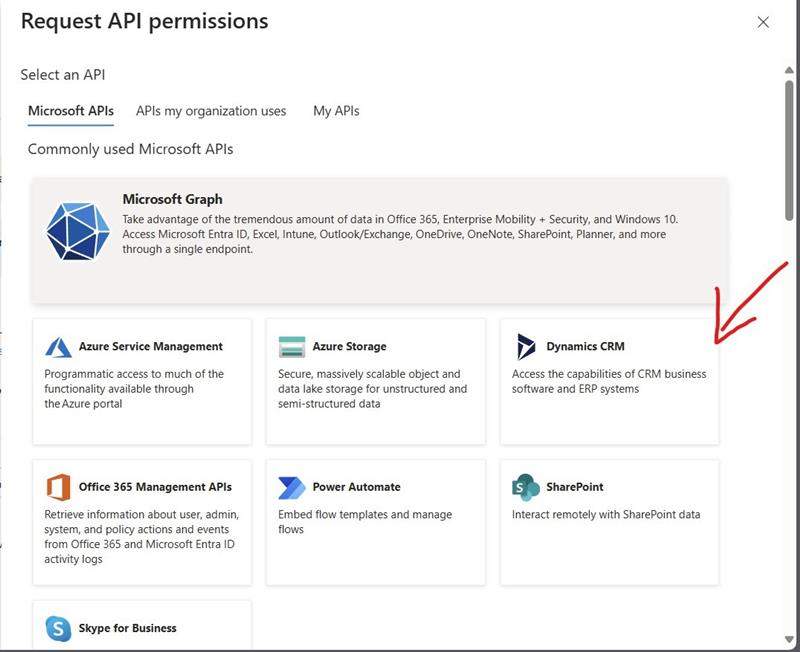
- Select dynamic crm.
- Then allow user permission.
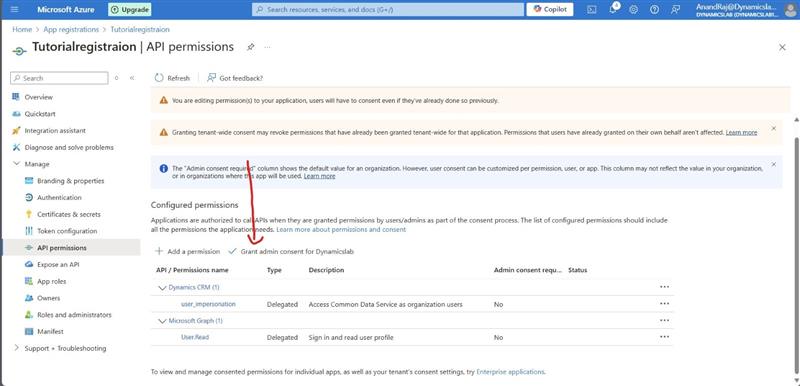
- Then grant admin consent.
- You will get you clientId and tenantId here.

Registering our app in dynamics.
Follow below Steps.
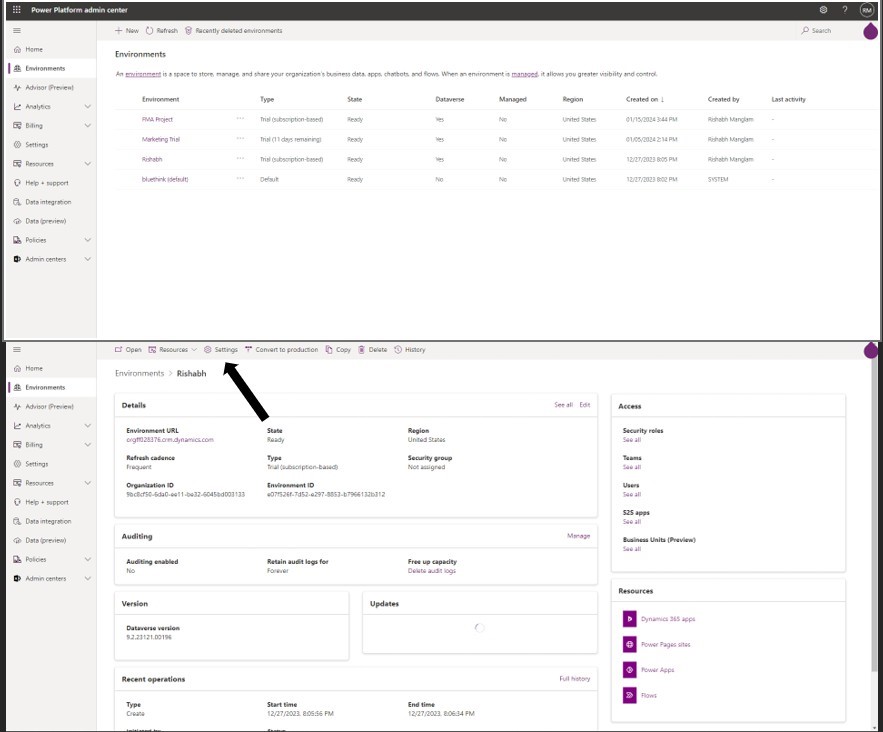
- Goto Power admin center.
- Select settings.
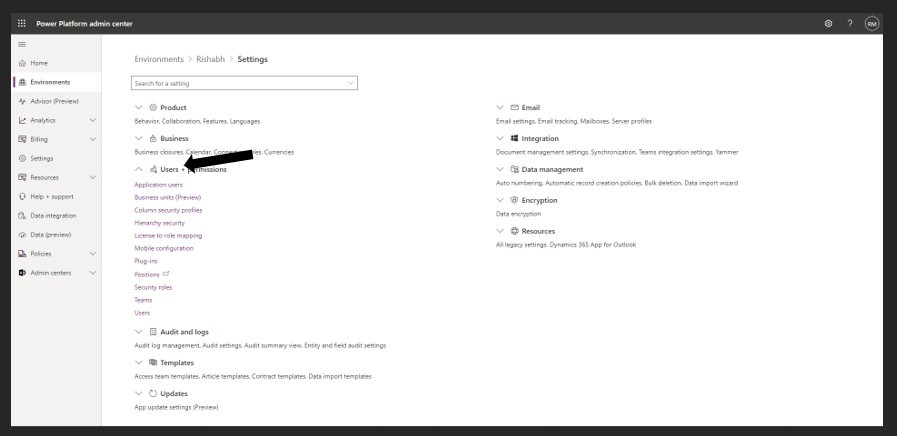
- Then User permissions and then application user.
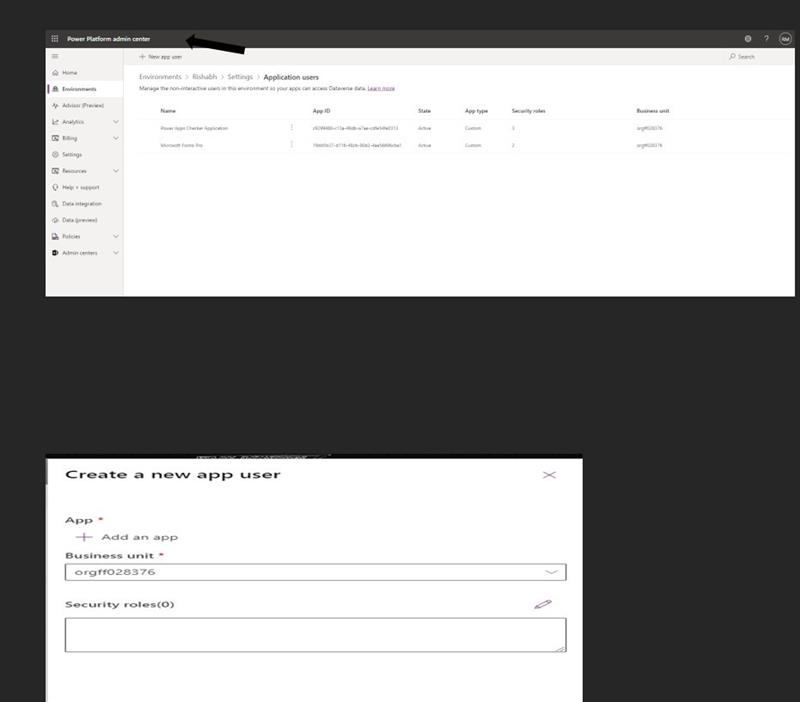
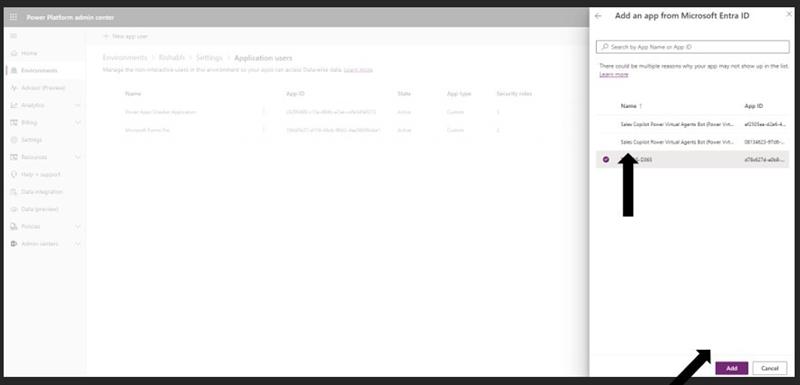
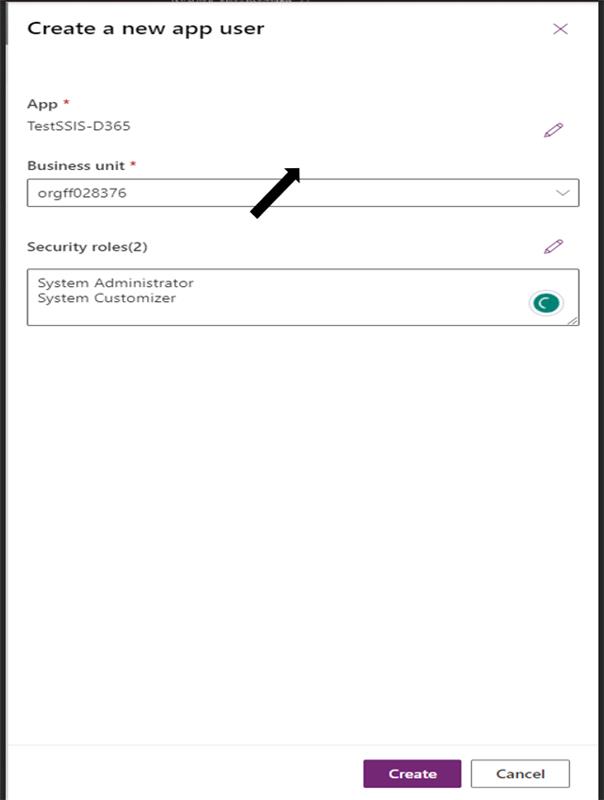
Done.
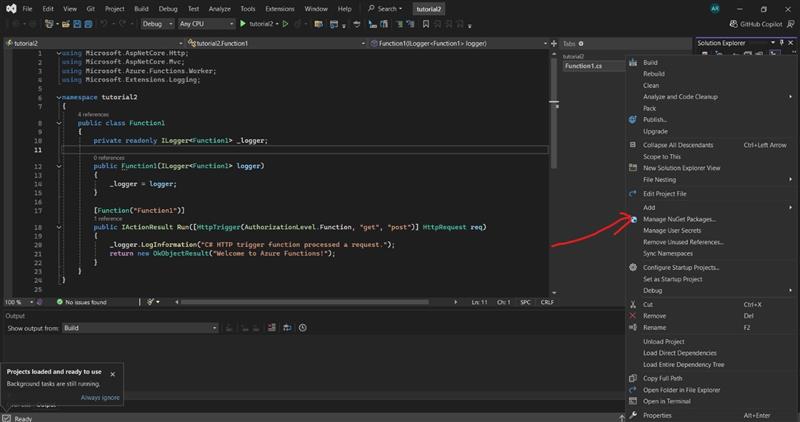
Now, we will create Azure Function to connect with the Dynamics 365 CRM we need to add the required NuGet Package [Microsoft.CrmSdk.CoreAssemblies]. To add the NuGet Package right-click on the Project and click on Manage Nuget packages.
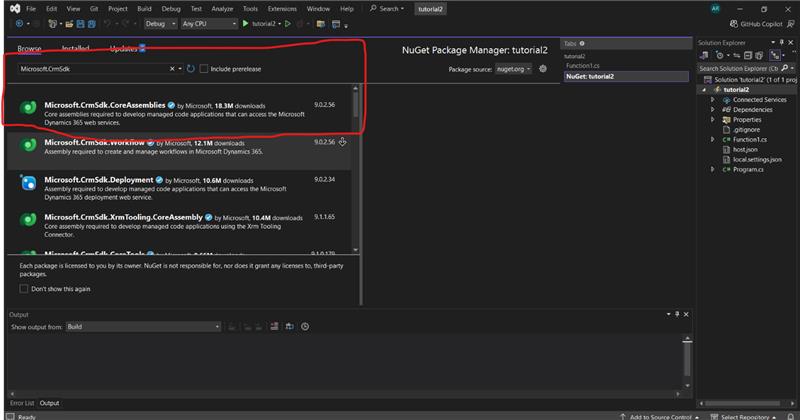
Install both these packages.
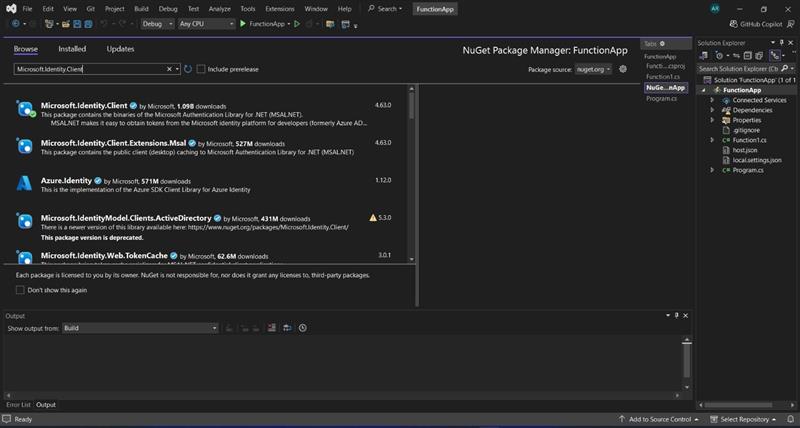
Now add these lines of code for connecting dynamics365 and azure function and run this function as described earlier in the steps(Run on localhost) to see if it is fetching the details from dynamics 365 or not.
|
1 2 3 4 5 6 7 8 9 10 11 12 13 14 15 16 17 18 19 20 21 22 23 24 25 26 27 28 29 30 31 32 33 34 35 36 37 38 39 40 41 42 43 44 45 46 47 48 49 50 51 52 53 54 55 56 57 58 59 60 61 62 63 64 65 66 67 68 69 70 71 72 73 74 75 76 77 78 79 80 81 82 83 |
using System; using System.Net.Http; using System.Net.Http.Headers; using System.Threading.Tasks; using Microsoft.AspNetCore.Http; using Microsoft.AspNetCore.Mvc; using Microsoft.Azure.Functions.Worker; using Microsoft.Extensions.Logging; using Microsoft.Identity.Client; namespace FunctionApp { public class Function1 { private readonly ILogger<Function1> _logger; // Azure AD and Dynamics 365 configuration private static readonly string clientId = "ffb1a722-cf8d-4aa6-bf9a-94f3ba34b29b"; private static readonly string clientSecret = "H5l8Q~W_t0V9BsdAgk6PE0FBpzZMQhYrRjnQgb9M"; private static readonly string tenantId = "f0efe3a8-3d51-4124-90f4-2248be97c31b"; private static readonly string authority = $"https://login.microsoftonline.com/{tenantId}"; private static readonly string scope = "https://orgba3084ec.crm8.dynamics.com/.default"; private static readonly string dynamicsBaseUrl = "https://orgba3084ec.crm8.dynamics.com/api/data/v9.1/"; public Function1(ILogger<Function1> logger) { _logger = logger; } [Function("DemoAnandFunction")] public async Task<IActionResult> Run([HttpTrigger(AuthorizationLevel.Function, "get", "post")] HttpRequest req) { _logger.LogInformation("C# HTTP trigger function processed a request."); try { } // Get OAuth token var token = await GetOAuthToken(); // Call Dynamics 365 API var data = await GetDynamicsData(token); return new OkObjectResult(data); catch (Exception ex) { _logger.LogError($"Error: {ex.Message}"); return new StatusCodeResult(StatusCodes.Status500InternalServerError); } } private async Task<string> GetOAuthToken() { IConfidentialClientApplication app = ConfidentialClientApplicationBuilder.Create(clientId) .WithClientSecret(clientSecret) .WithAuthority(new Uri(authority)) .Build(); string[] scopes = new string[] { scope }; AuthenticationResult result = await app.AcquireTokenForClient(scopes).ExecuteAsync(); return result.AccessToken; } private async Task<string> GetDynamicsData(string token) { using (HttpClient client = new HttpClient()) { client.DefaultRequestHeaders.Authorization = new AuthenticationHeaderValue("Bearer", token); client.DefaultRequestHeaders.Accept.Add(new MediaTypeWithQualityHeaderValue("application/json")); HttpResponseMessage response = await client.GetAsync($"{dynamicsBaseUrl}nw_students"); response.EnsureSuccessStatusCode(); string responseBody = await response.Content.ReadAsStringAsync(); return responseBody; } } } } |
Connecting azure and dynamics using webhooks to trigger function base on operation performed on crm.
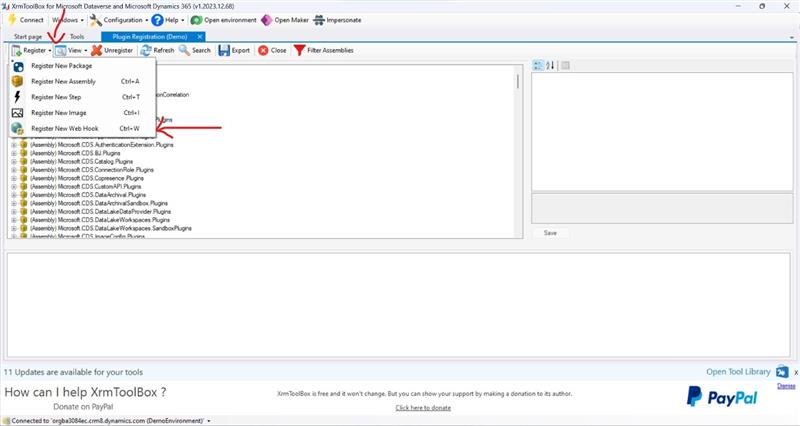
- Open xrm toolbox and connect it you your environment.
- Open Plugin registration tool and click on register then select add new webhook from the dropdown.
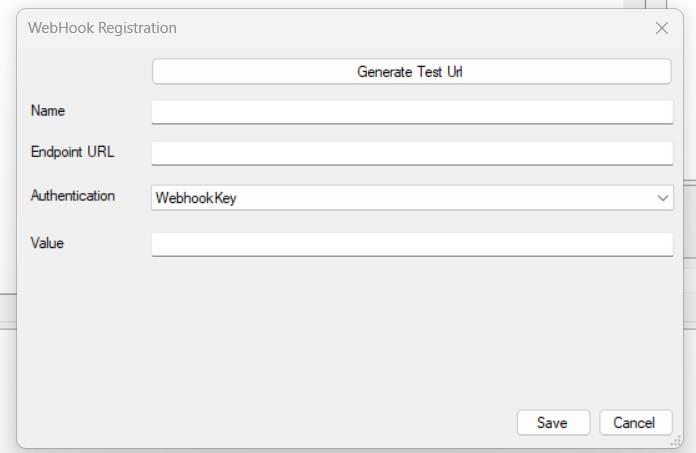
Add Name of your choice and the endpoint url that we will get from the azure portal follow these steps.
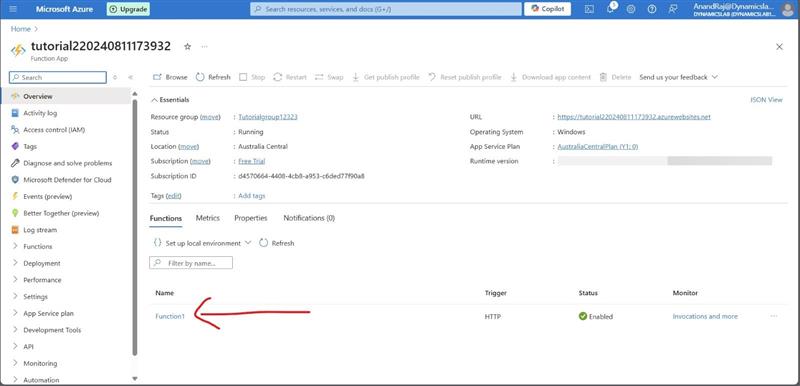
- Goto azure portal and select the resource which contains your function app.
- Select the function that you published from visual code.
- Select get function url
- Copy the master url it have two parts one the endpoint url and one is code separate it.
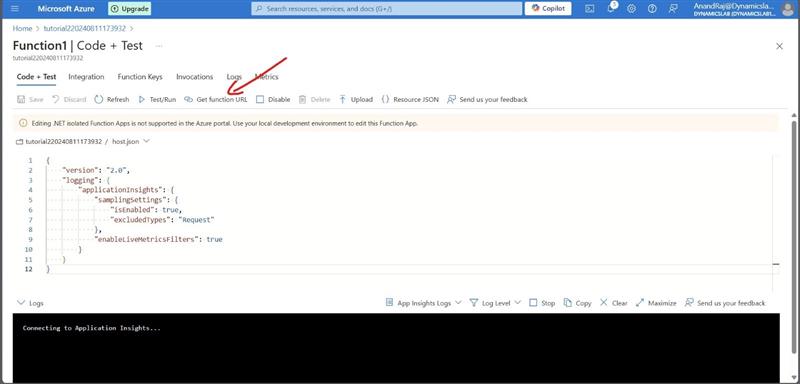

Copy the url before the question mark
https://tutorial220240811173932.azurewebsites.net/api/Function1
Code:code=s6SVPfIBy6M2pQBNAMFeU4auOc4_IW75d7KDhpzdE1MfAzFuEo31hg%3D%3D
Now paste the url in endpoint url in plugin tool and code in key (only paste the code after =signs6SVPfIBy6M2pQBNAMFeU4auOc4_IW75d7KDhpzdE1MfAzFuEo31hg%3D%3D).
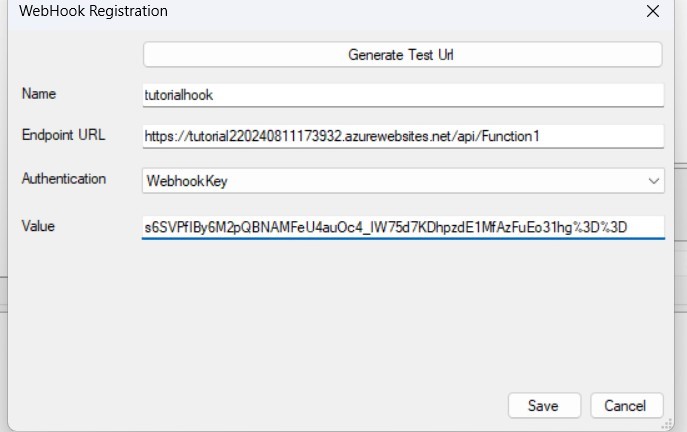
Now click on save.
Now register a new step on this webhook on which the url will be hit and the function will run.


bluethinkinc_blog
2025-02-03