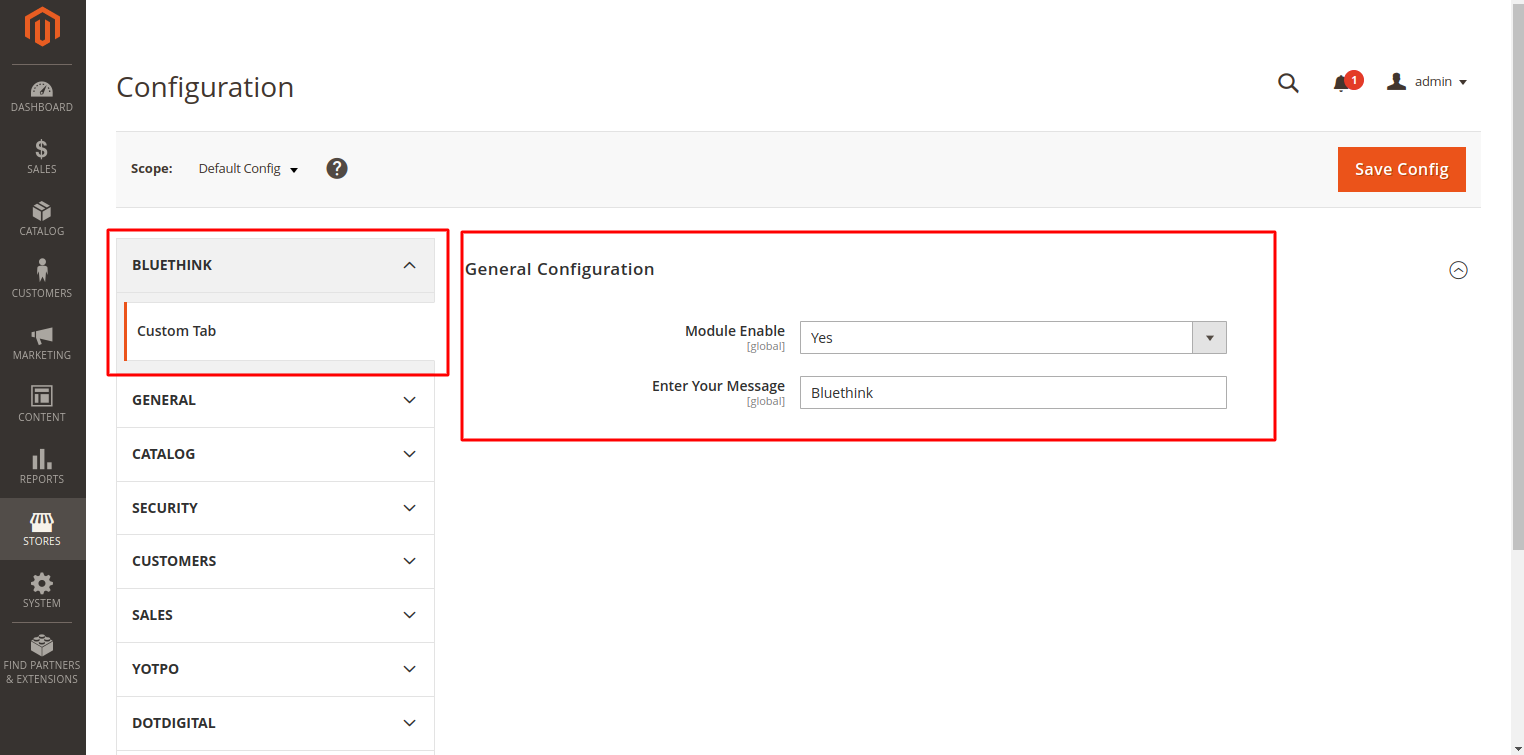
To create Custom Tab In Admin Configuration module, you need to complete the following steps:
Step 2 : Create etc/module.xml file
Step 3 : Create etc/registration.php file
Step 4 : Enable the module
Then, it is necessary to create etc folder and add the module.xml file
app/code/BlueThink/CustomTab/etc/module.xml
|
1 2 3 4 5 |
<?xml version="1.0"?> <config xmlns:xsi="http://www.w3.org/2001/XMLSchema-instance" xsi:noNamespaceSchemaLocation="urn:magento:framework:Module/etc/module.xsd"> <module name="BlueThink_CustomTab" setup_version="1.0.0"> </module> </config> |
Step 2 : Create etc/registration.php file
In this step, we will add registration.php as following guide:
app/code/BlueThink/CustomTab/registration.php
|
1 2 3 4 5 6 |
<?php \Magento\Framework\Component\ComponentRegistrar::register( \Magento\Framework\Component\ComponentRegistrar::MODULE, 'BlueThink_CustomTab', __DIR__ ); |
Step 3 : Enable the module
Finish the step 3, we have already created the HelloWorld module. And we will enable this module in this step
After create the module if you run the command as:
php bin/magento module:status
You should see the module is disable now:
List of disabled modules: BlueThink_CustomTab
enable the module right now, let run the command as:
php bin/magento module:enable BlueThink_CustomTab
After Enable Module Then Run this Command
|
1 2 3 4 5 |
sudo php bin/magento setup:upgrade sudo php bin/magento setup:di:compile sudo php bin/magento setup:static-content:deploy -f sudo php bin/magento c:f sudo chmod -R 777 var/ pub/static generated/ |
Step 4 : Create system.xml File
app/code/BlueThink/CustomTab/etc/adminhtml/system.xml
|
1 2 3 4 5 6 7 8 9 10 11 12 13 14 15 16 17 18 19 20 21 22 23 24 25 26 27 28 |
<?xml version="1.0"?> <config xmlns:xsi="http://www.w3.org/2001/XMLSchema-instance" xsi:noNamespaceSchemaLocation="urn:magento:module:Magento_Config:etc/system_file.xsd"> <system> <tab id="bluethink" translate="label" sortOrder="10"> <label>BlueThink</label> </tab> <section id="bluethinkcustom" translate="label" sortOrder="130" showInDefault="1" showInWebsite="1" showInStore="1"> <class>separator-top</class> <label>Custom Tab</label> <tab>bluethink</tab> <resource>BlueThink_CustomTab::bluethinkcustom_config</resource> <group id="general" translate="label" type="text" sortOrder="10" showInDefault="1" showInWebsite="0" showInStore="0"> <label>General Configuration</label> <field id="enable" translate="label" type="select" sortOrder="1" showInDefault="1" showInWebsite="0" showInStore="0"> <label>Module Enable</label> <source_model>Magento\Config\Model\Config\Source\Yesno</source_model> </field> <field id="message" translate="label" type="text" sortOrder="1" showInDefault="1" showInWebsite="0" showInStore="0"> <label>Enter Your Message</label> <depends> <field id="enable">1</field> </depends> <!-- <comment>This text will display on the frontend.</comment> --> </field> </group> </section> </system> </config> |
Step 5 : Set default value
Each field in system.xml after create will not have any value. When you call them, you will receive ‘null’ result. So for the module, we will need to set the default value for the field and you will call the value without go to config, set value and save it. This default value will be saved in config.xml which is located in etc folder. Let’s create it for this simple configuration:
app/code/BlueThink/CustomTab/etc/config.xml
|
1 2 3 4 5 6 7 8 9 10 11 |
<?xml version="1.0"?> <config xmlns:xsi="http://www.w3.org/2001/XMLSchema-instance" xsi:noNamespaceSchemaLocation="urn:magento:module:Magento_Store:etc/config.xsd"> <default> <bluethinkcustom> <general> <enable>1</enable> <message>Bluethink</message> </general> </bluethinkcustom> </default> </config> |
You can put the path to the field in the <default> element to set value default for it. The format is:
|
1 2 3 4 5 6 7 |
<default> <section> <group> <field>{value}</field> </group> </section> </default> |
Step 6: Flush Magento Cache
Now, please refresh your cache and see the result:


bluethinkinc_blog
2022-07-22